YY/T 0681.5-2010: Test methods for sterile medical device package. Part 5: Detecting gross leaks in medical packaging by internal pressurization (bubble test)
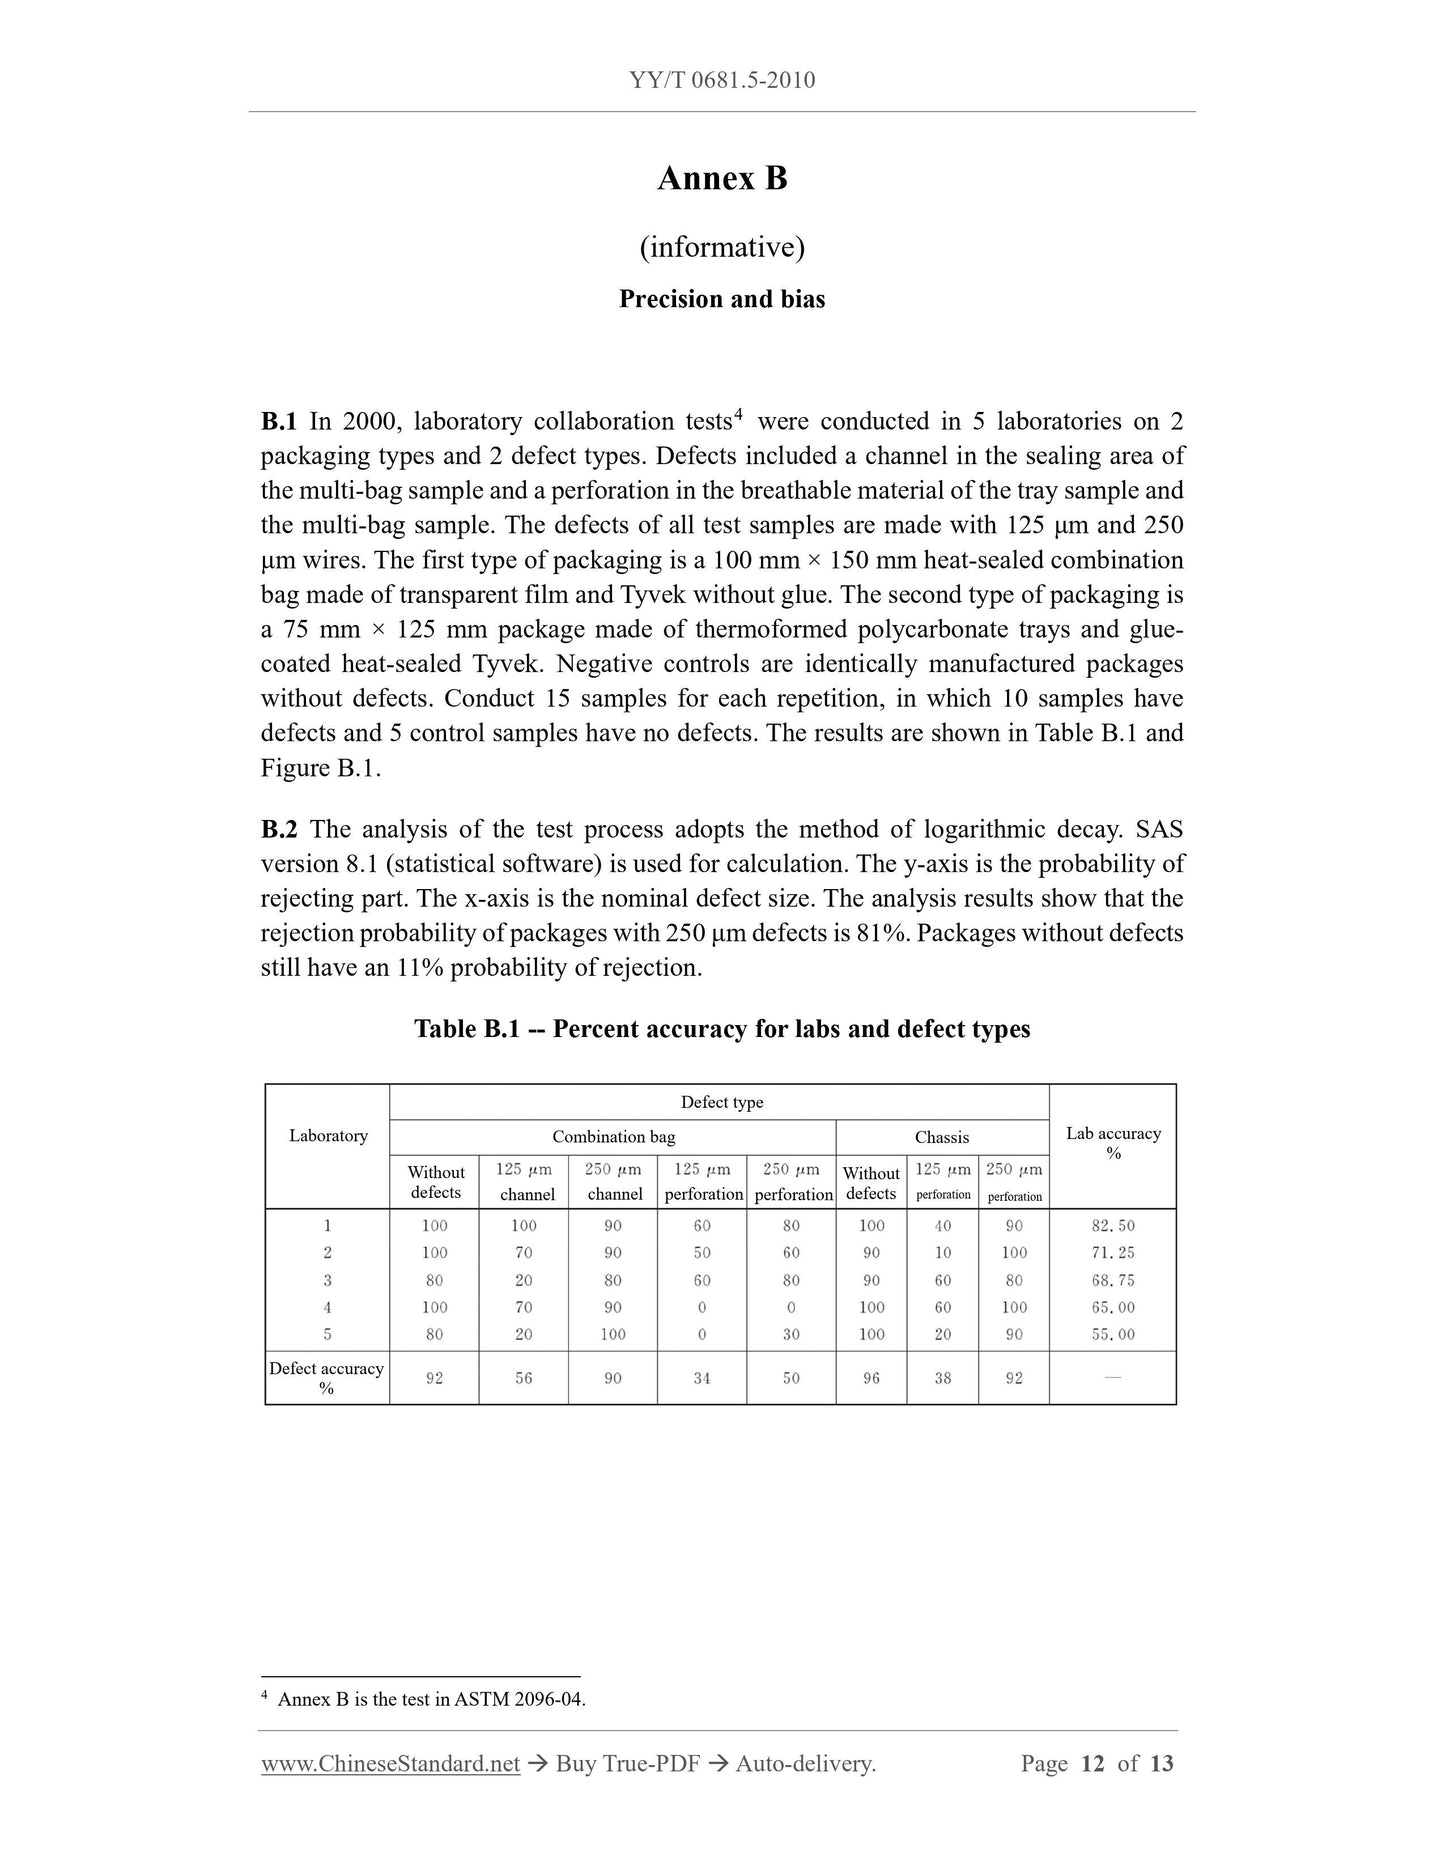
This Part of YY/T 0681 covers the inspection of gross leaks in medical packaging. The sensitivity of the method has a detection probability of 81% for pore sizes above 250 μm (see Annex B). This test method can be used for pallet and multi-bag packaging. This test method evaluates sensitivity only for spunbond polyolefin or non-breathable packaging. The sensitivity of other packages with gas permeable materials is not evaluated. This method is a destructive test. In the test, it is necessary to inject air into the package to form internal pressure.
Basic Data
Standard ID
YY/T 0681.5-2010 (YY/T0681.5-2010)
Description (Translated English)
Test methods for sterile medical device package. Part 5: Detecting gross leaks in medical packaging by internal pressurization (bubble test)
Sector / Industry
Medical Device and Pharmaceutical Industry Standard (Recommended)
Classification of Chinese Standard
C31
Classification of International Standard
11.080.40
Word Count Estimation
10,160
Date of Issue
2010-12-27
Date of Implementation
2012-06-01
Quoted Standard
GB/T 2918
Adopted Standard
ASTM F2096-2004, MOD
Regulation (derived from)
State Food and Drug Administration Notice 2010 No. 97
Issuing agency(ies)
State Food and Drug Administration
Summary
This standard specifies the medical packaging coarse leak test. Sensitivity of the method for the detection aperture 250��m probability of more than 81% (see Appendix B). This test method can be used pallets and mix bag. This test method is only permeable spunbonded polyolefin packaging evaluate sensitivity or to other packaging materials with gas permeability not evaluate its sensitivity. This method is destructive testing, tests need to be injected into the air inside of the package, the formation of internal pressure.