Skip to product information
1 of 7

PayPal, credit cards. Download editable-PDF and invoice in 1 second!

GB/T 38683-2020 English PDF (GB/T38683-2020)

GB/T 38683-2020 English PDF (GB/T38683-2020)

Regular price $185.00
Regular price Sale price $185.00
Sale Sold out
Shipping calculated at checkout.
GB/T 38683-2020: Method of ultrasonic testing for large inclusions in bearing steel
Delivery: 9 seconds. Download (& Email) true-PDF + Invoice.
Get Quotation: Click GB/T 38683-2020 (Self-service in 1-minute)
Historical versions (Master-website): GB/T 38683-2020
Preview True-PDF (Reload/Scroll-down if blank)

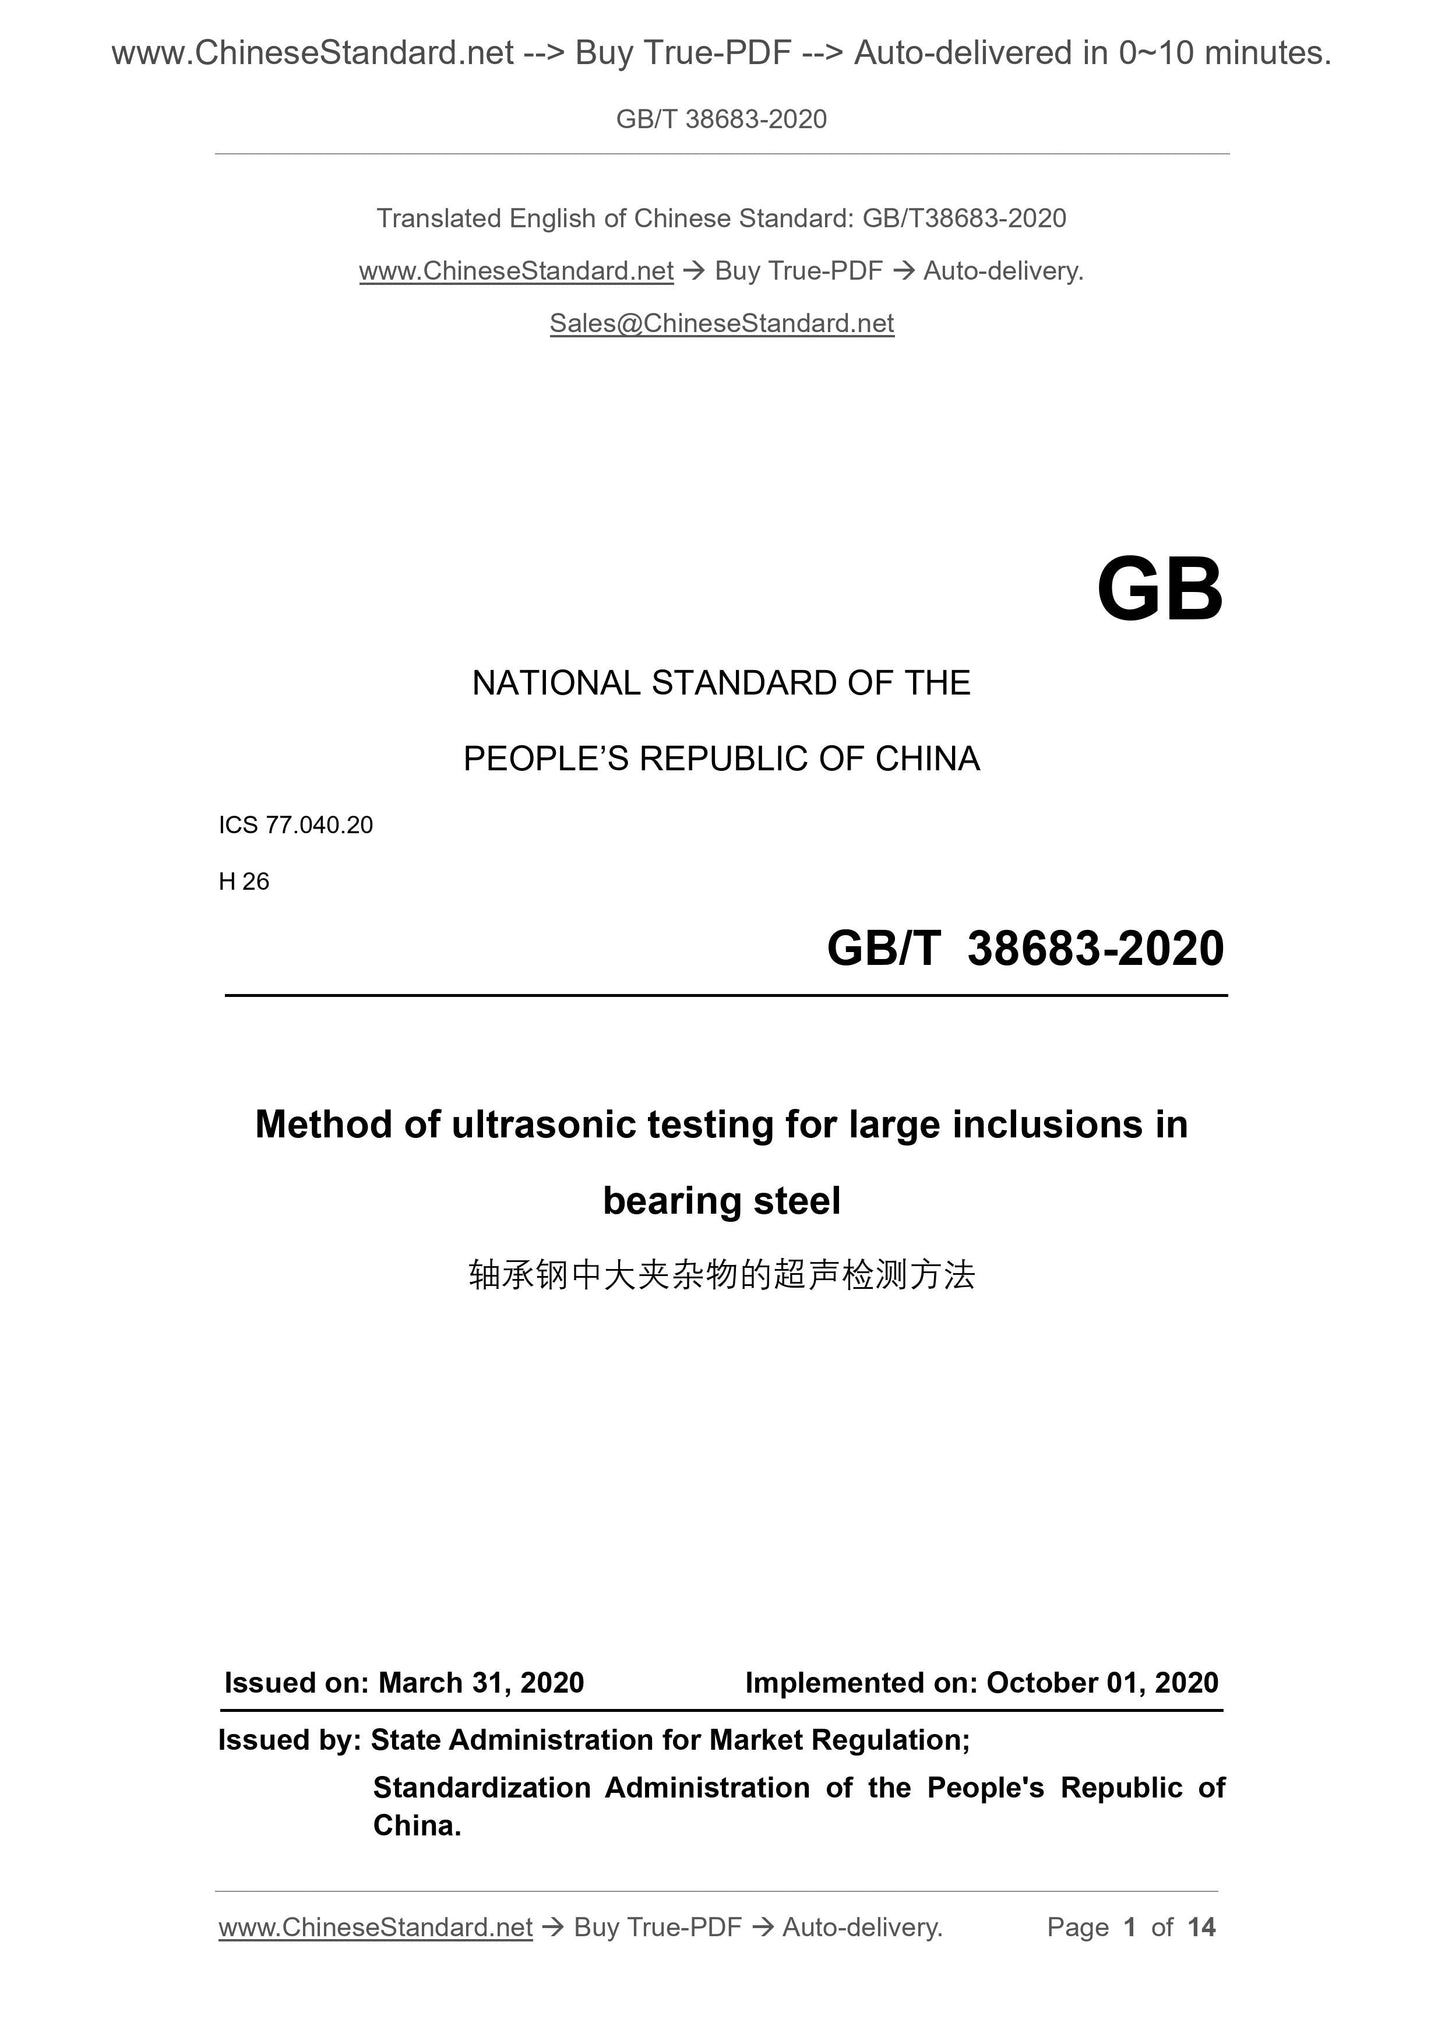
GB/T 38683-2020
GB
NATIONAL STANDARD OF THE
PEOPLE’S REPUBLIC OF CHINA
ICS 77.040.20
H 26
Method of ultrasonic testing for large inclusions in
bearing steel
ISSUED ON: MARCH 31, 2020
IMPLEMENTED ON: OCTOBER 01, 2020
Issued by: State Administration for Market Regulation;
Standardization Administration of the People's Republic of
China.
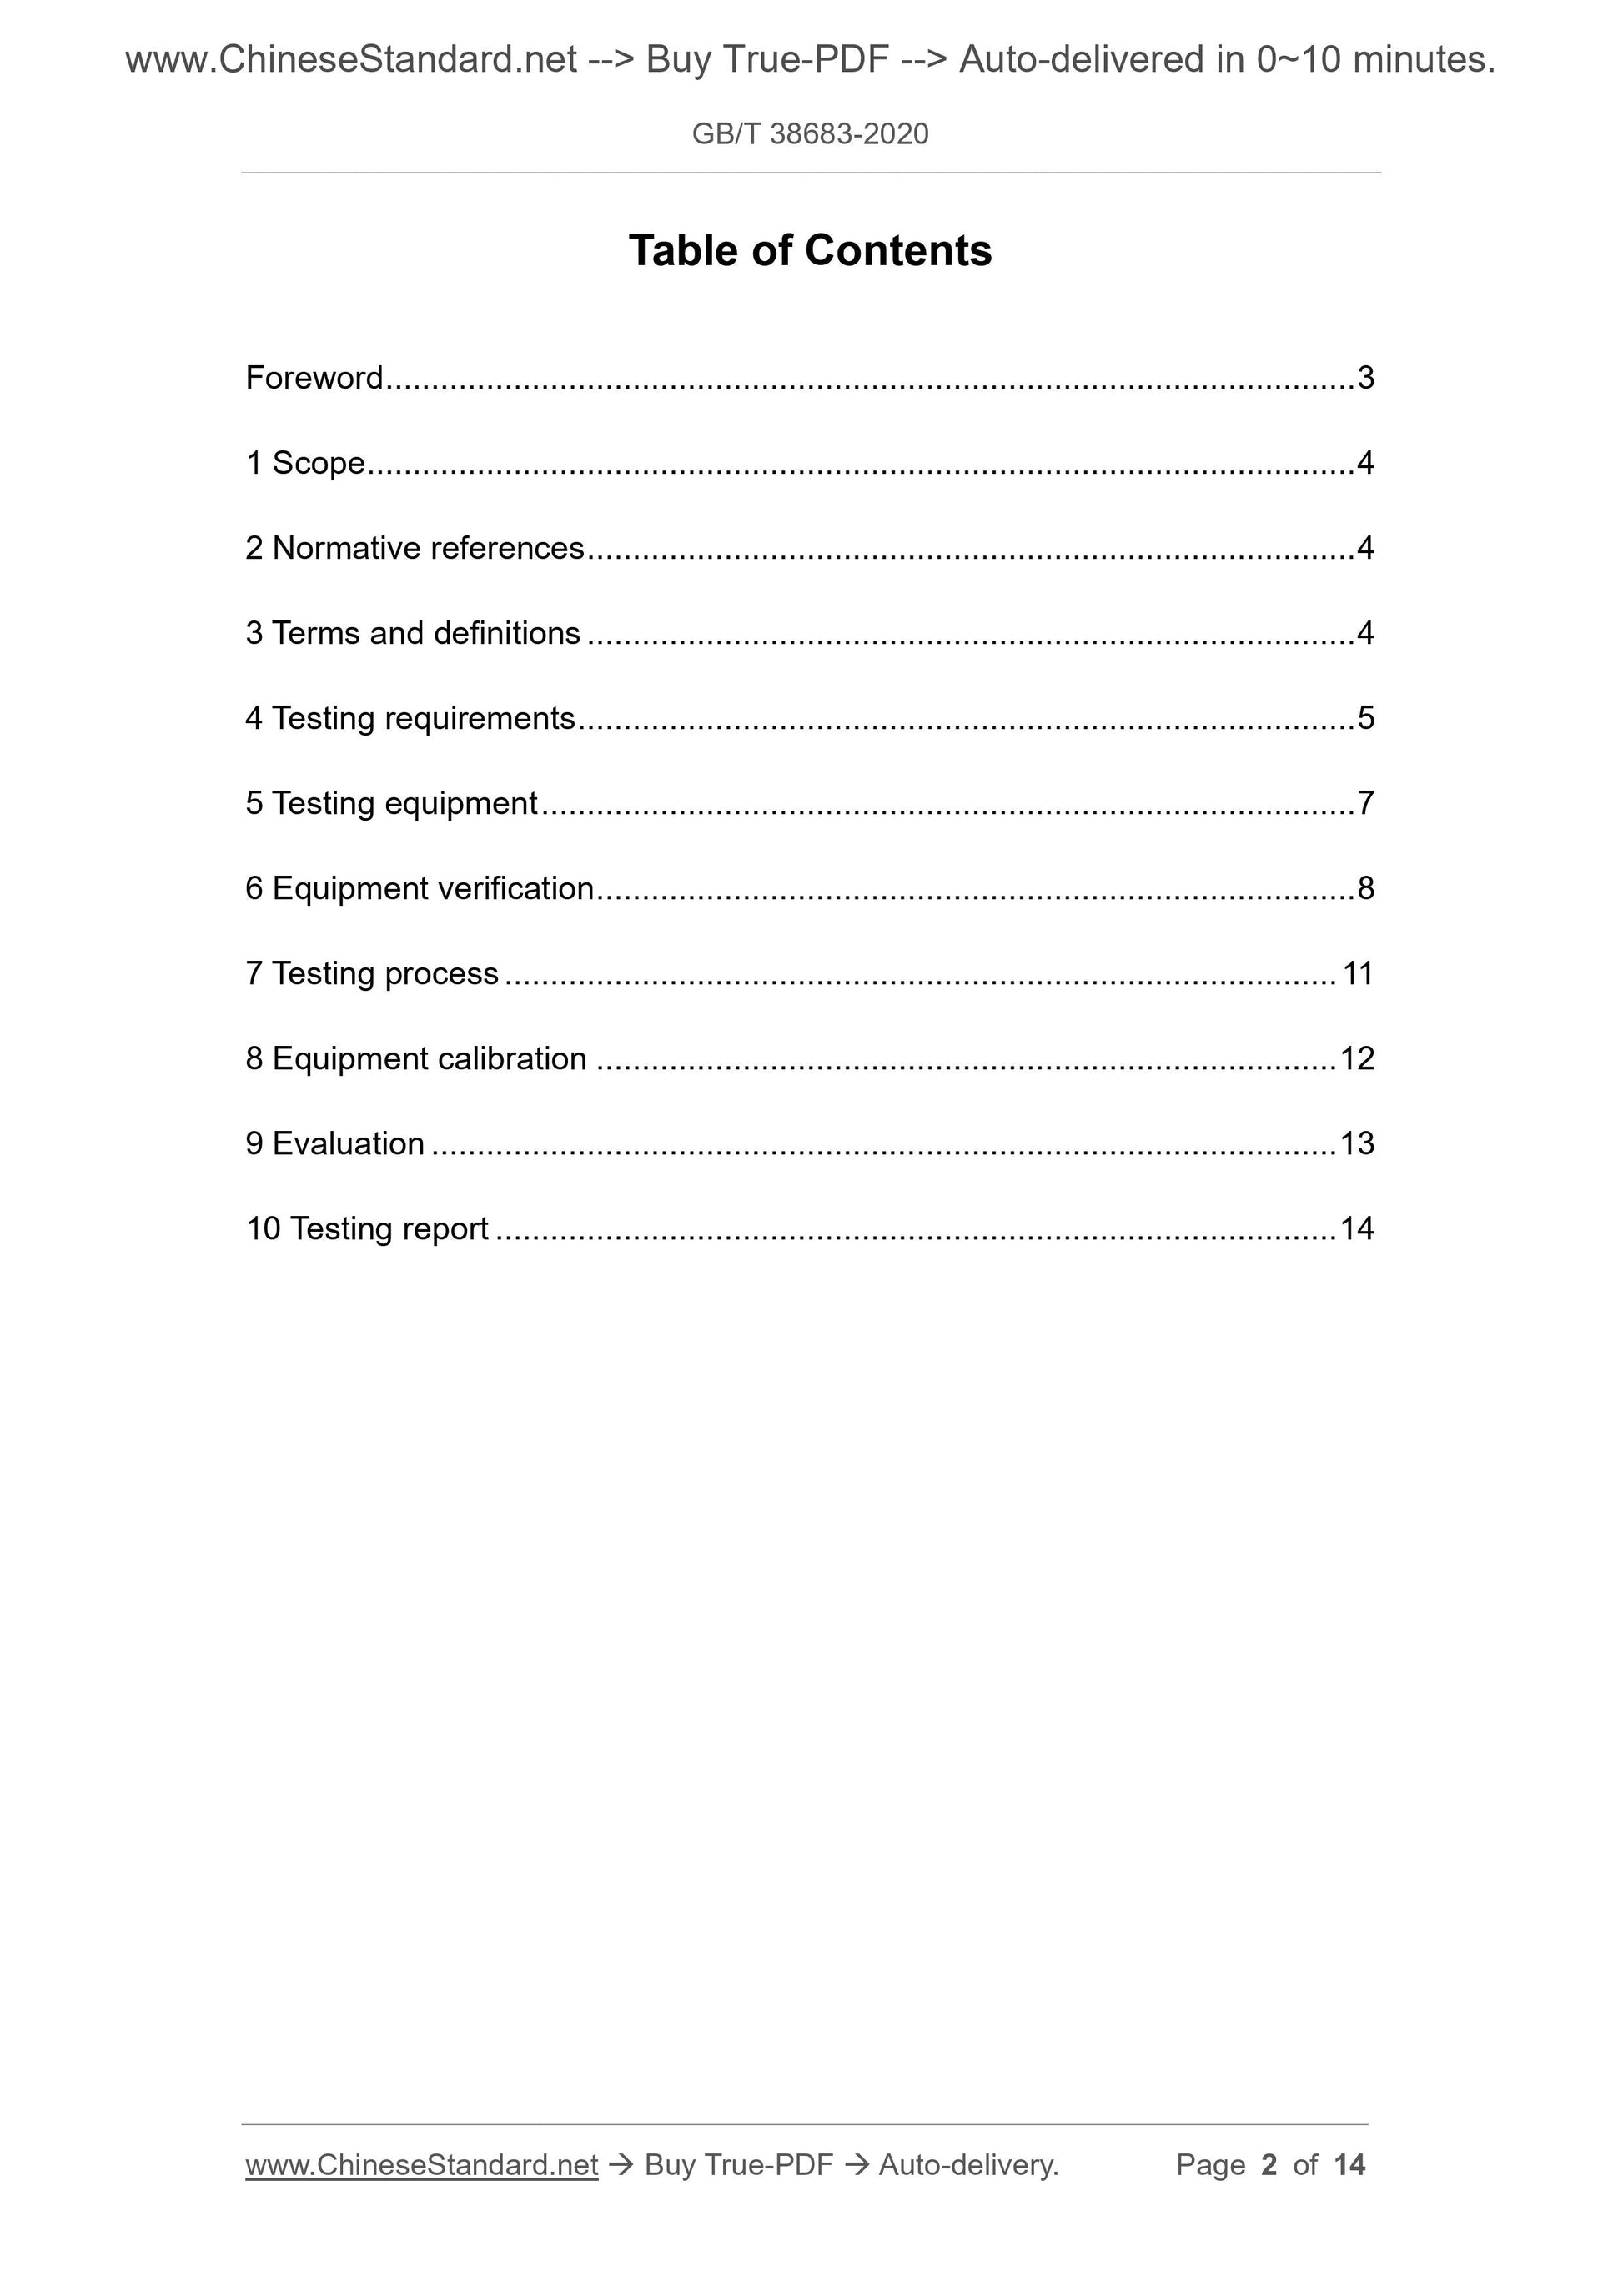
Table of Contents
Foreword ... 3
1 Scope ... 4
2 Normative references ... 4
3 Terms and definitions ... 4
4 Testing requirements ... 5
5 Testing equipment ... 7
6 Equipment verification ... 8
7 Testing process ... 11
8 Equipment calibration ... 12
9 Evaluation ... 13
10 Testing report ... 14
Method of ultrasonic testing for large inclusions in
bearing steel
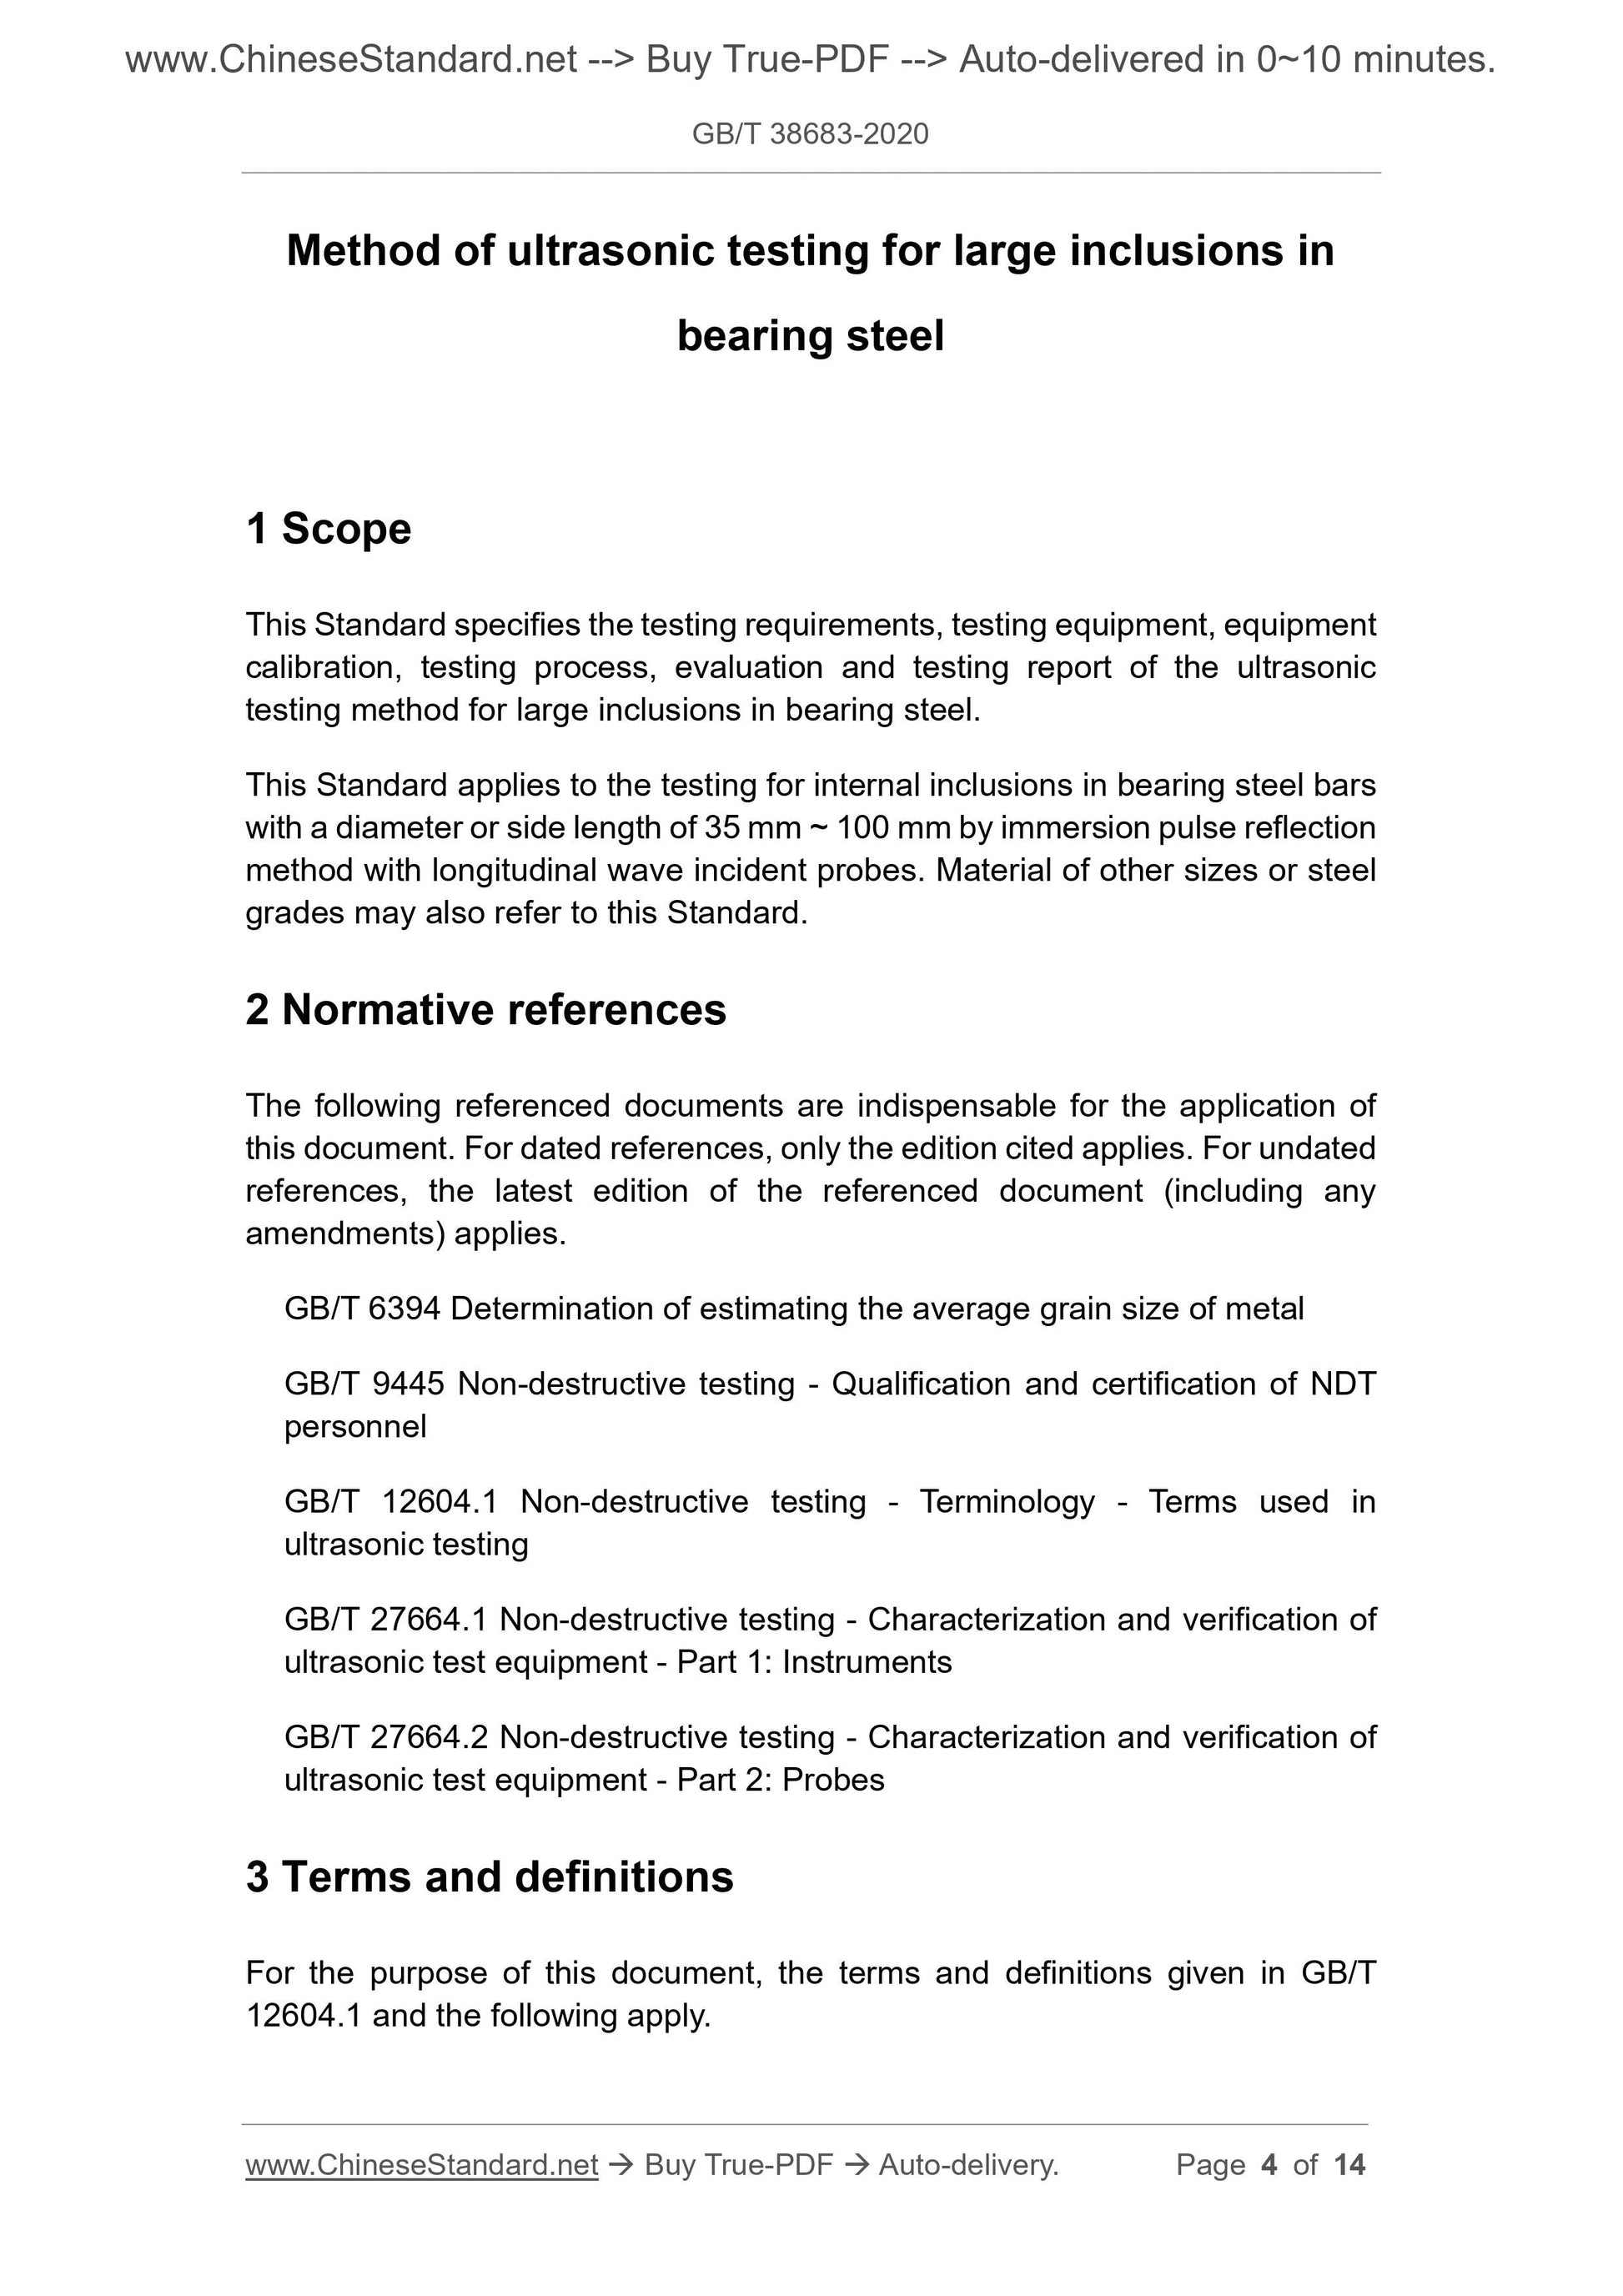
1 Scope
This Standard specifies the testing requirements, testing equipment, equipment
calibration, testing process, evaluation and testing report of the ultrasonic
testing method for large inclusions in bearing steel.
This Standard applies to the testing for internal inclusions in bearing steel bars
with a diameter or side length of 35 mm ~ 100 mm by immersion pulse reflection
method with longitudinal wave incident probes. Material of other sizes or steel
grades may also refer to this Standard.
2 Normative references
The following referenced documents are indispensable for the application of
this document. For dated references, only the edition cited applies. For undated
references, the latest edition of the referenced document (including any
amendments) applies.
GB/T 6394 Determination of estimating the average grain size of metal
GB/T 9445 Non-destructive testing - Qualification and certification of NDT
personnel
GB/T 12604.1 Non-destructive testing - Terminology - Terms used in
ultrasonic testing
GB/T 27664.1 Non-destructive testing - Characterization and verification of
ultrasonic test equipment - Part 1: Instruments
GB/T 27664.2 Non-destructive testing - Characterization and verification of
ultrasonic test equipment - Part 2: Probes
3 Terms and definitions
For the purpose of this document, the terms and definitions given in GB/T
12604.1 and the following apply.
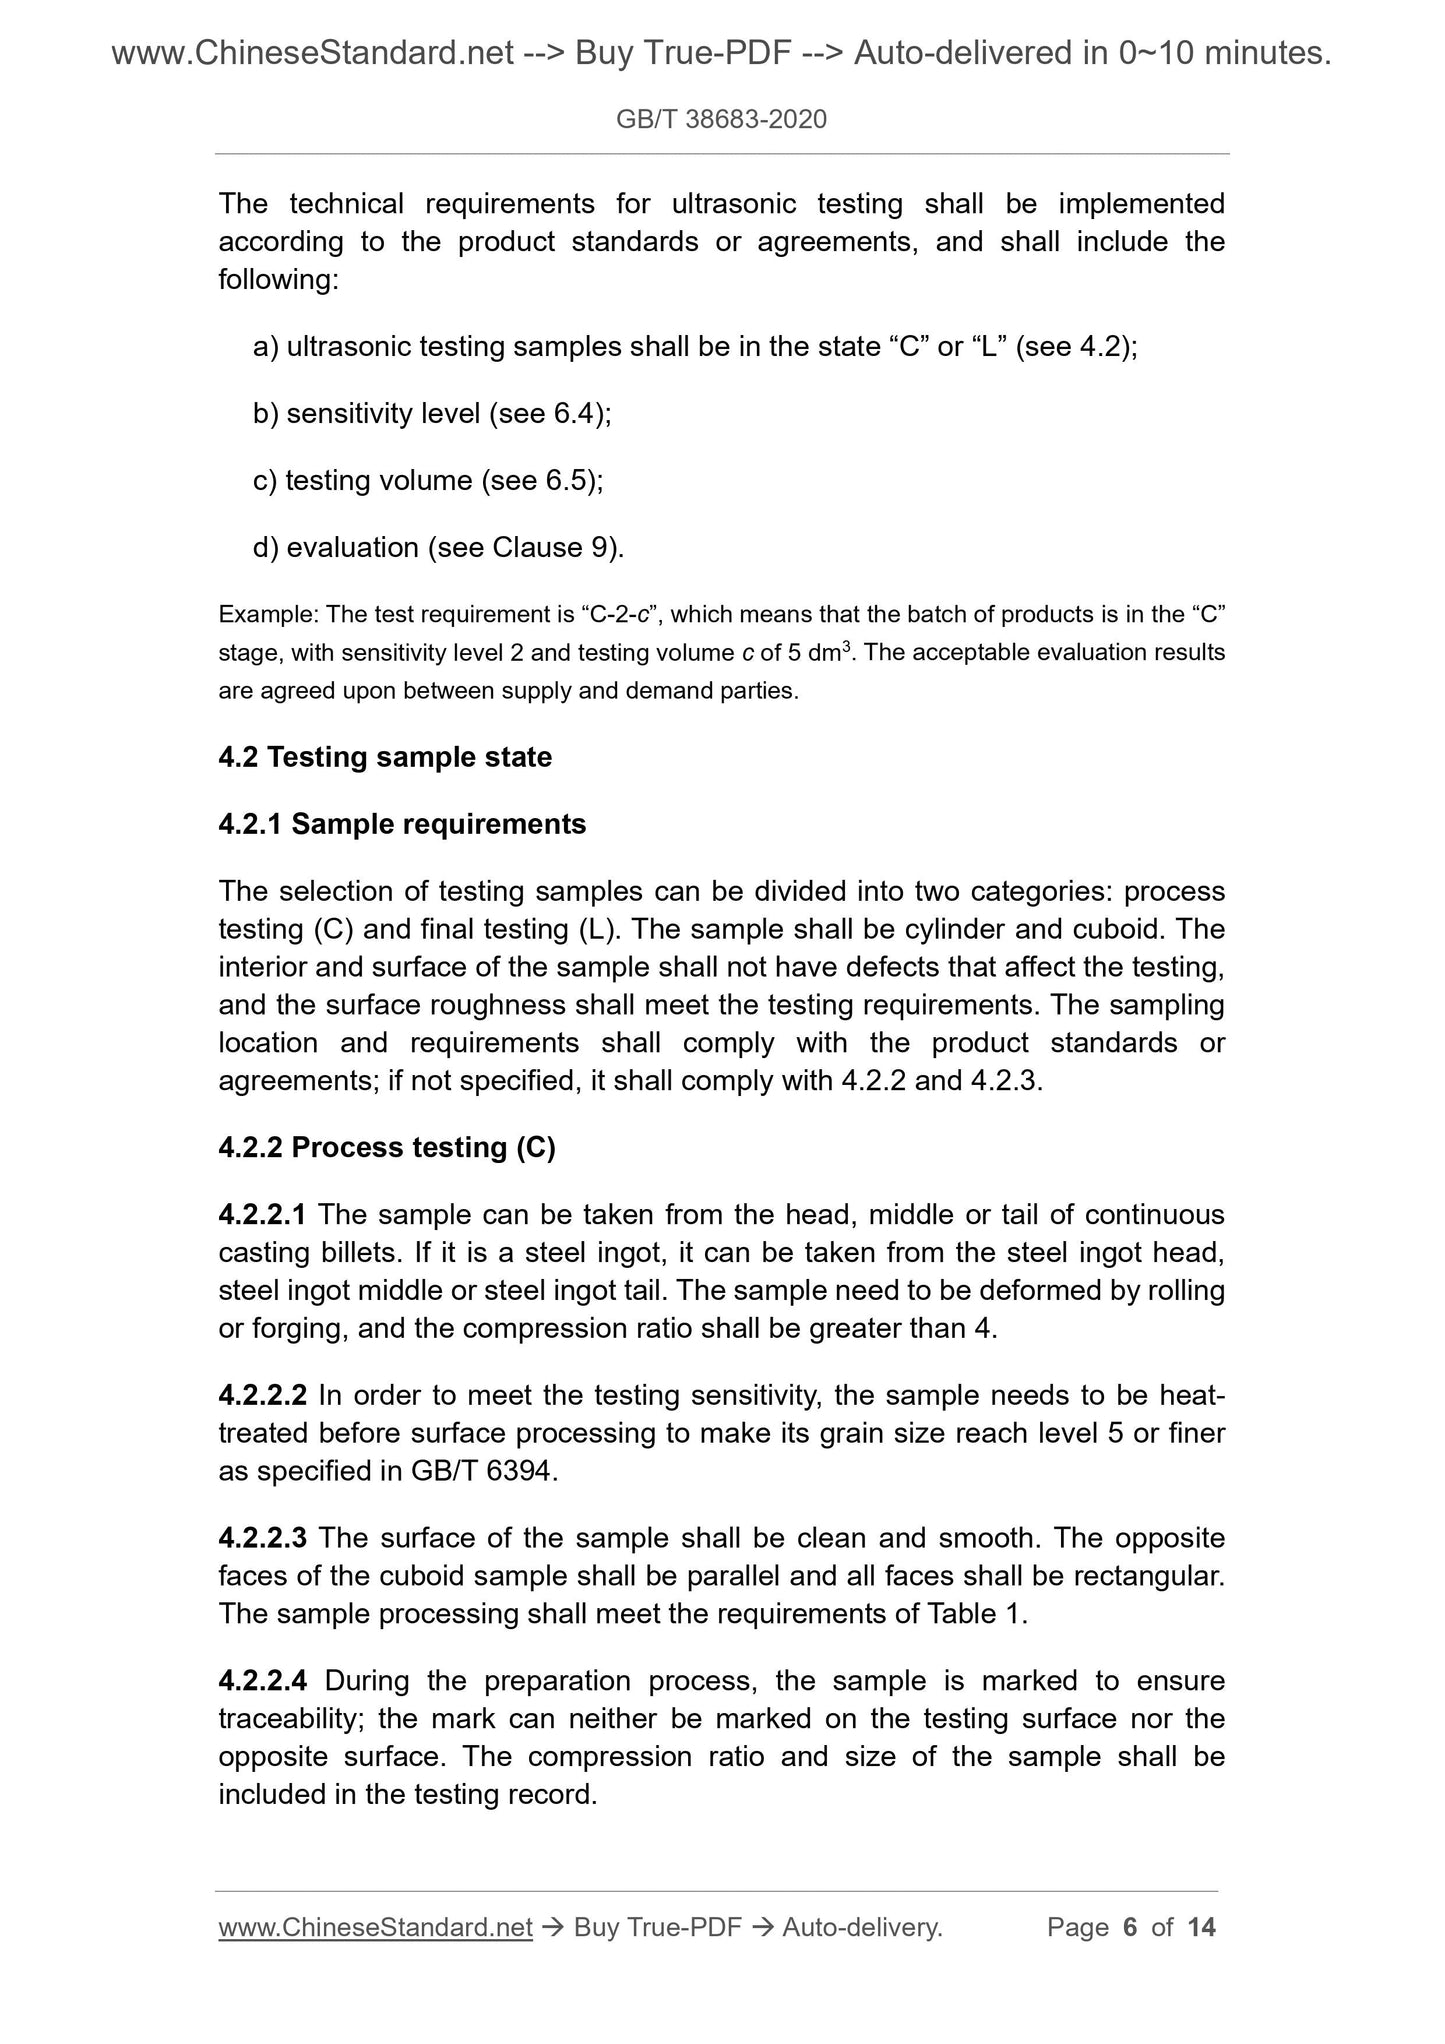
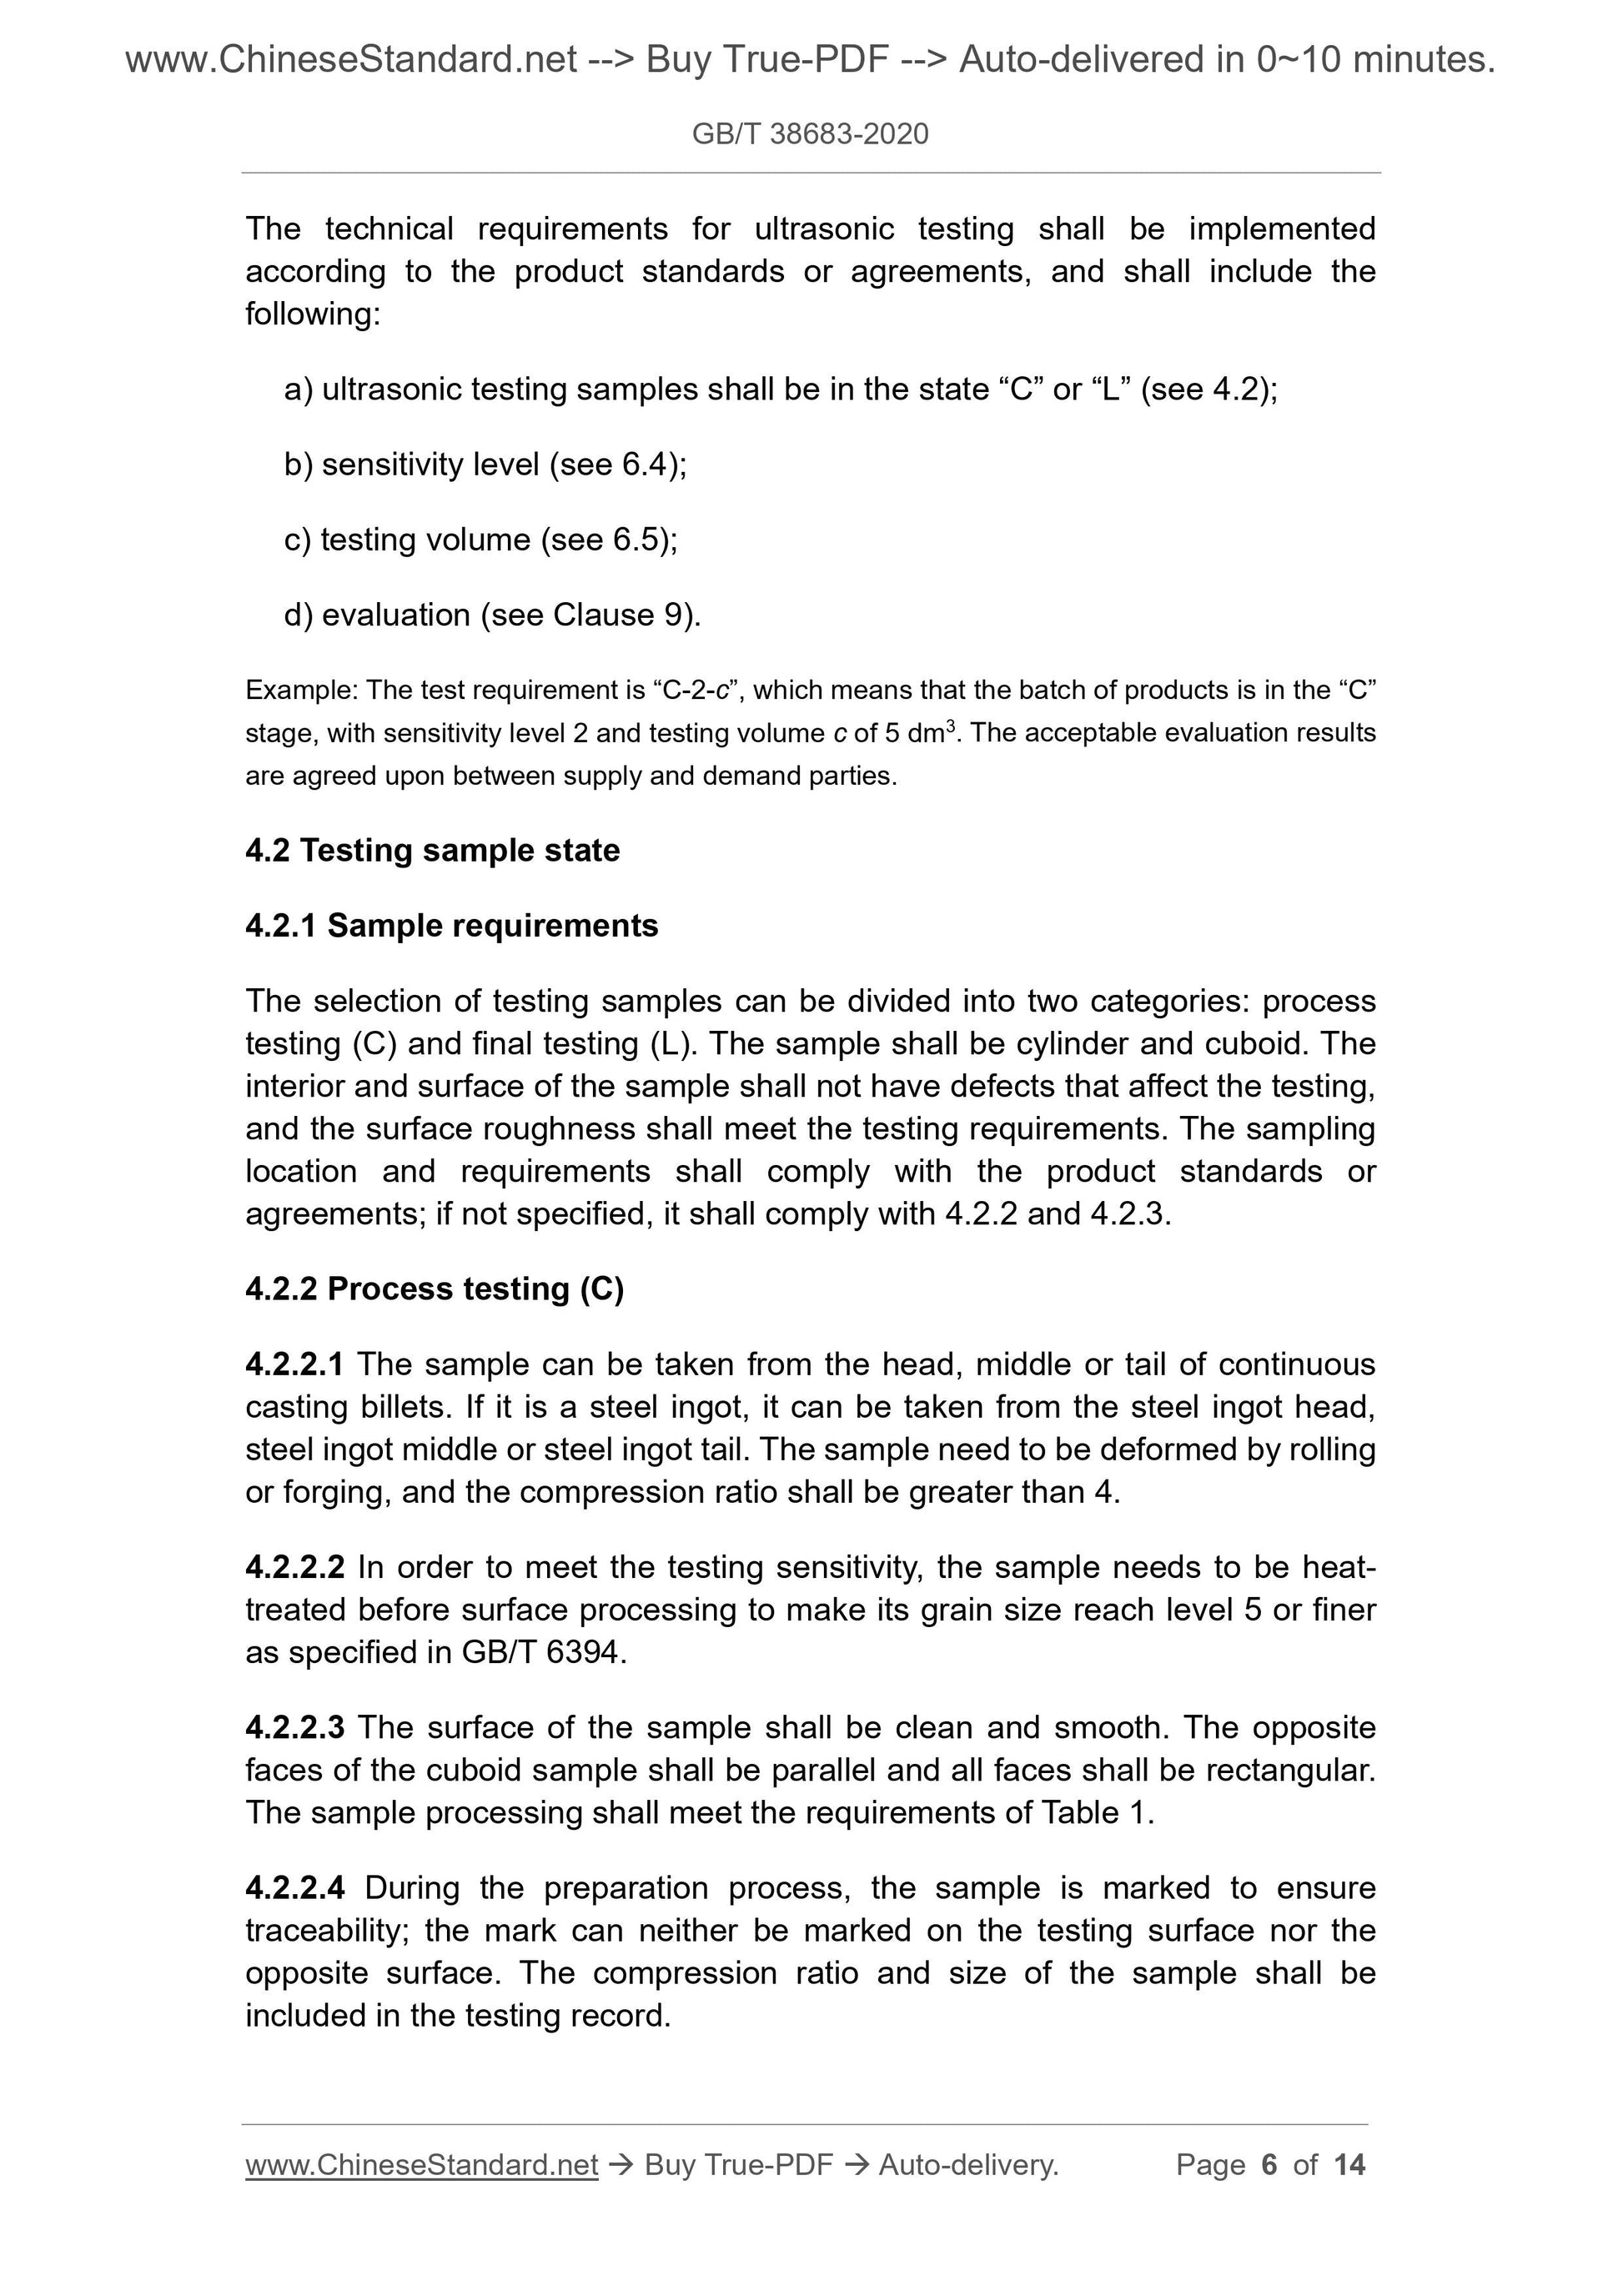
The technical requirements for ultrasonic testing shall be implemented
according to the product standards or agreements, and shall include the
following:
a) ultrasonic testing samples shall be in the state “C” or “L” (see 4.2);
b) sensitivity level (see 6.4);
c) testing volume (see 6.5);
d) evaluation (see Clause 9).
Example: The test requirement is “C-2-c”, which means that the batch of products is in the “C”
stage, with sensitivity level 2 and testing volume c of 5 dm3. The acceptable evaluation results
are agreed upon between supply and demand parties.
4.2 Testing sample state
4.2.1 Sample requirements
The selection of testing samples can be divided into two categories: process
testing (C) and final testing (L). The sample shall be cylinder and cuboid. The
interior and surface of the sample shall not have defects that affect the testing,
and the surface roughness shall meet the testing requirements. The sampling
location and requirements shall comply with the product standards or
agreements; if not specified, it shall comply with 4.2.2 and 4.2.3.
4.2.2 Process testing (C)
4.2.2.1 The sample can be taken from the head, middle or tail of continuous
casting billets. If it is a steel ingot, it can be taken from the steel ingot head,
steel ingot middle or steel ingot tail. The sample need to be deformed by rolling
or forging, and the compression ratio shall be greater than 4.
4.2.2.2 In order to meet the testing sensitivity, the sample needs to be heat-
treated before surface processing to make its grain size reach level 5 or finer
as specified in GB/T 6394.
4.2.2.3 The surface of the sample shall be clean and smooth. The opposite
faces of the cuboid sample shall be parallel and all faces shall be rectangular.
The sample processing shall meet the requirements of Table 1.
4.2.2.4 During the preparation process, the sample is marked to ensure
traceability; the mark can neither be marked on the testing surface nor the
opposite surface. The compression ratio and size of the sample shall be
included in the testing record.
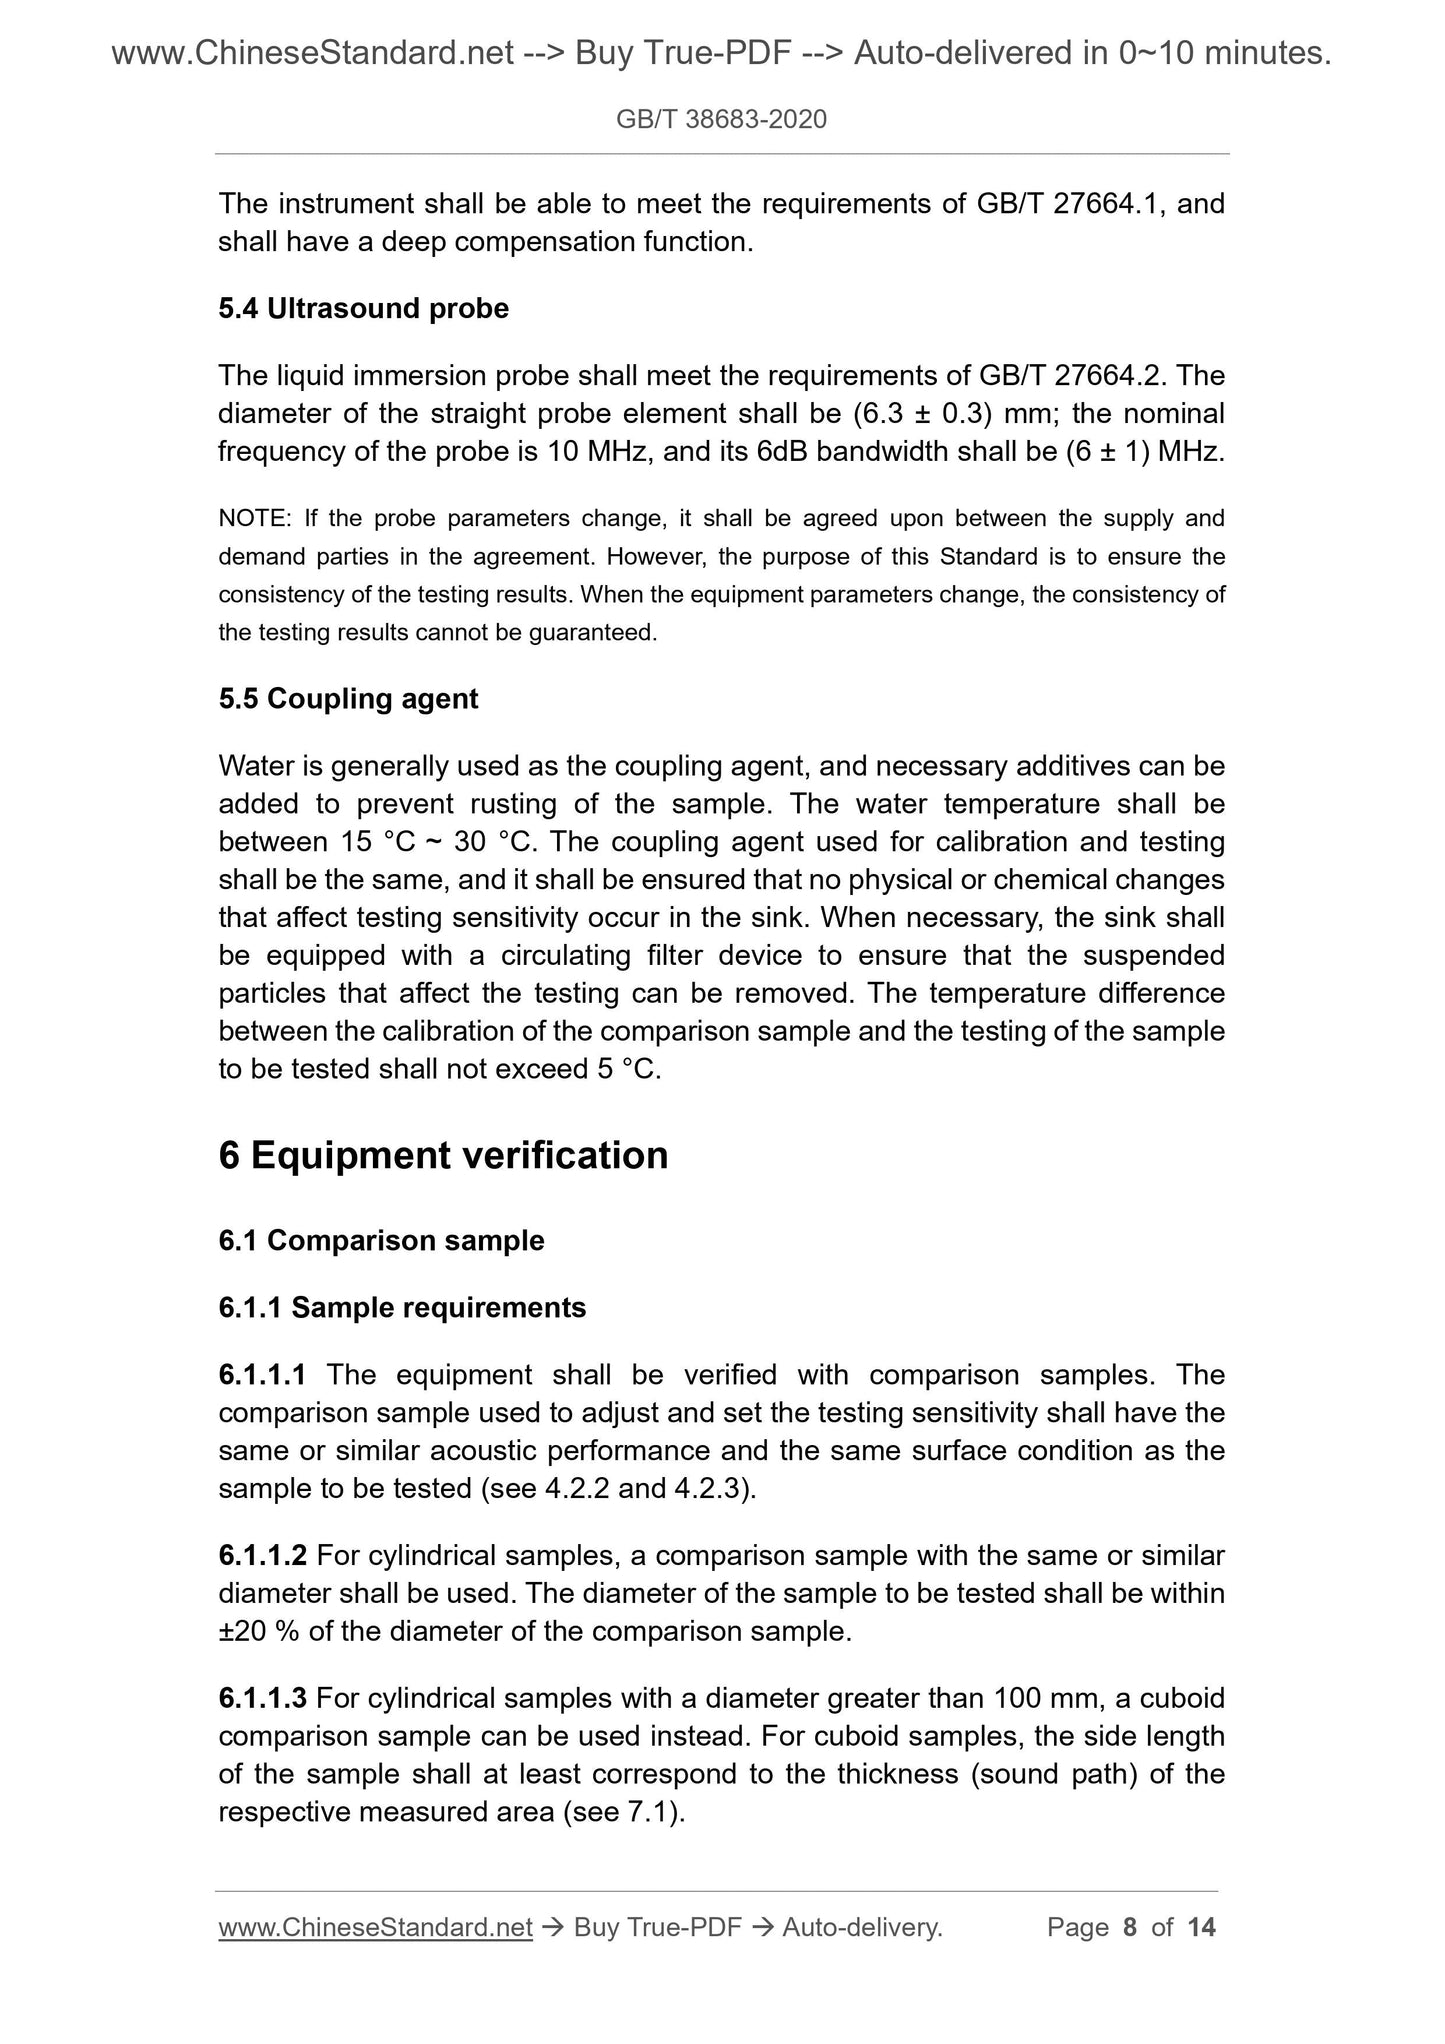
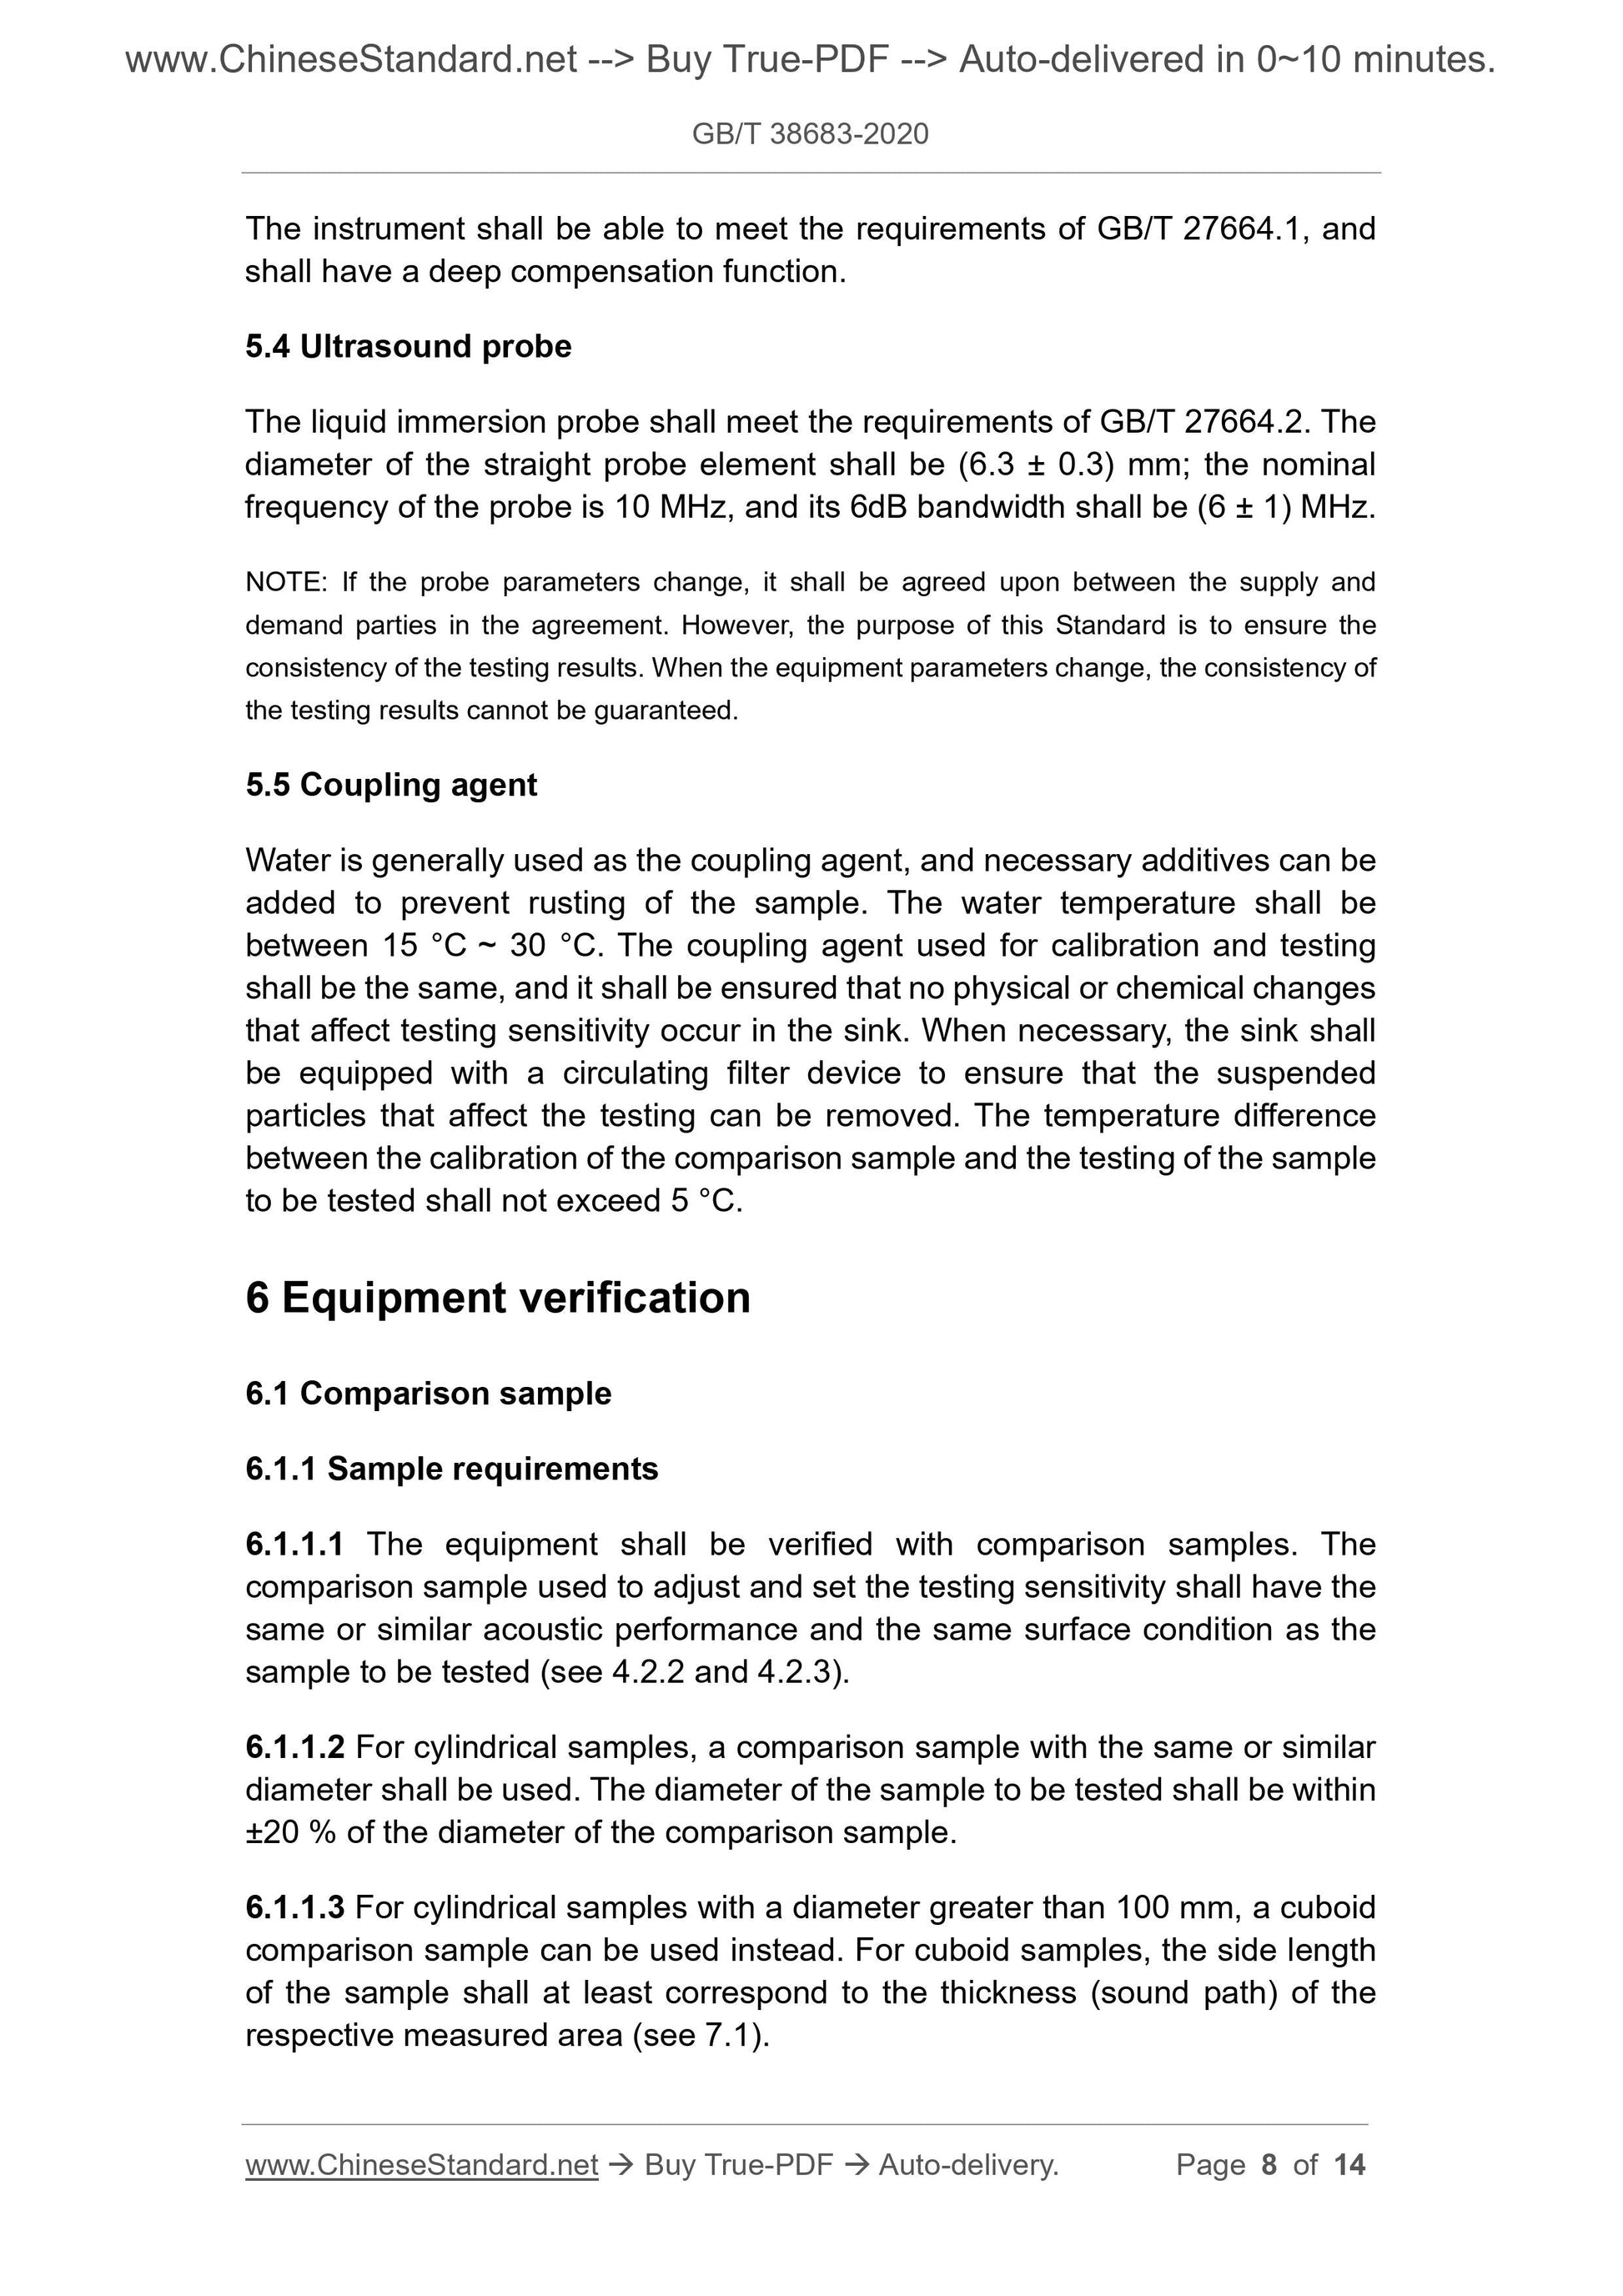
The instrument shall be able to meet the requirements of GB/T 27664.1, and
shall have a deep compensation function.
5.4 Ultrasound probe
The liquid immersion probe shall meet the requirements of GB/T 27664.2. The
diameter of the straight probe element shall be (6.3 ± 0.3) mm; the nominal
frequency of the probe is 10 MHz, and its 6dB bandwidth shall be (6 ± 1) MHz.
NOTE: If the probe parameters change, it shall be agreed upon between the supply and
demand parties in the agreement. However, the purpose of this Standard is to ensure the
consistency of the testing results. When the equipment parameters change, the consistency of
the testing results cannot be guaranteed.
5.5 Coupling agent
Water is generally used as the coupling agent, and necessary additives can be
added to prevent rusting of the sample. The water temperature shall be
between 15 °C ~ 30 °C. The coupling agent used for calibration and testing
shall be the same, and it shall be ensured that no physical or chemical changes
that affect testing sensitivity occur in the sink. When necessary, the sink shall
be equipped with a circulating filter device to ensure that the suspended
particles that affect the testing can be removed. The temperature difference
between the calibration of the comparison sample and the testing of the sample
to be tested shall not exceed 5 °C.
6 Equipment verification
6.1 Comparison sample
6.1.1 Sample requirements
6.1.1.1 The equipment shall be verified with comparison samples. The
comparison sample used to adjust and set the testing sensitivity shall have the
same or similar acoustic performance and the same surface condition as the
sample to be tested (see 4.2.2 and 4.2.3).
6.1.1.2 For cylindrical samples, a comparison sample with the same or similar
diameter shall be used. The diameter of the sample to be tested shall be within
±20 % of the diameter of the comparison sample.
6.1.1.3 For cylindrical samples with a diameter greater than 100 mm, a cuboid
comparison sample can be used instead. For cuboid samples, the side length
of the sample shall at least correspond to the thickness (sound path) of the
respective measured area (see 7.1).
6.2 Water layer thickness
During adjustment and testing, the thickness of the water layer between the
probe and the sample to be tested shall be 40 mm ~ 45 mm.
6.3 Sensitivity adjustment
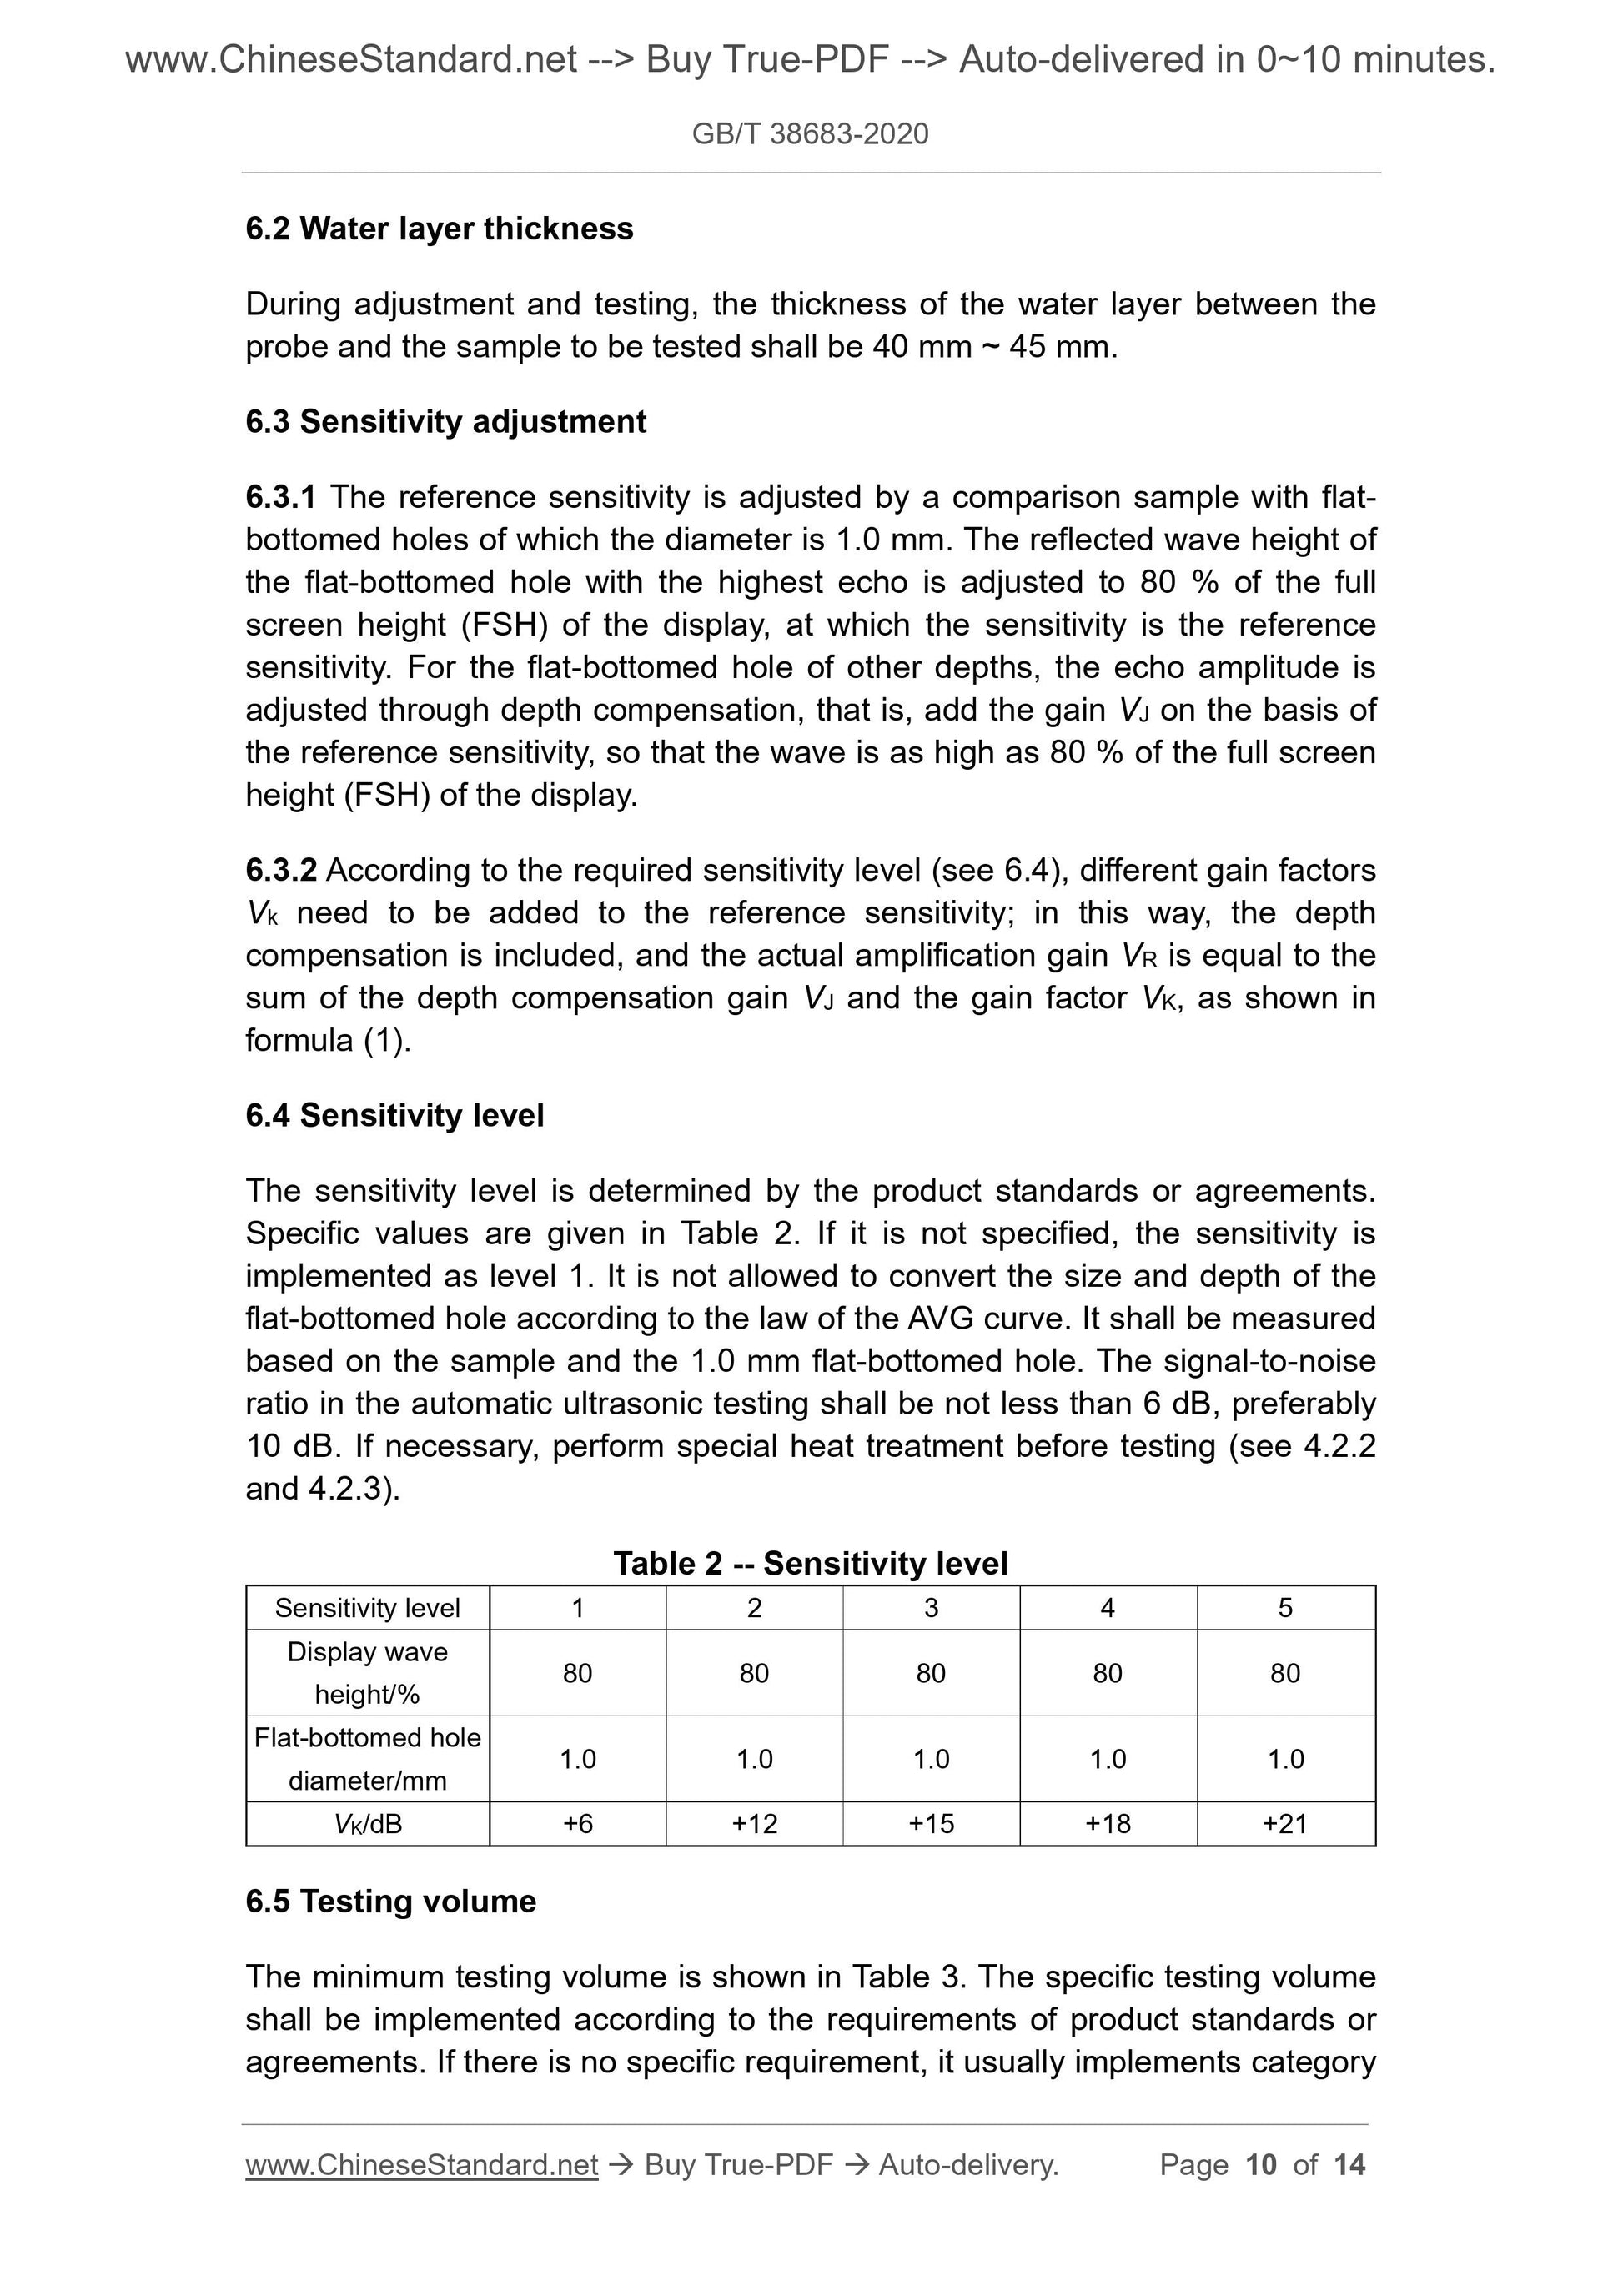
6.3.1 The reference sensitivity is adjusted by a comparison sample with flat-
bottomed holes of which the diameter is 1.0 mm. The reflected wave height of
the flat-bottomed hole with the highest echo is adjusted to 80 % of the full
screen height (FSH) of the display, at which the sensitivity is the reference
sensitivity. For the flat-bottomed hole of other depths, the echo amplitude is
adjusted through depth compensation, that is, add the gain VJ on the basis of
the reference sensitivity, so that the wave is as high as 80 % of the full screen
height (FSH) of the display.
6.3.2 According to the required sensitivity level (see 6.4), different gain factors
Vk need to be added to the reference sensitivity; in this way, the depth
compensation is included, and the actual amplification gain VR is equal to the
sum of the depth compensation gain VJ and the gain factor VK, as shown in
formula (1).
6.4 Sensitivity level
The sensitivity level is determined by the product standards or agreements.
Specific values are given in Table 2. If it is not specified, the sensitivity is
implemented as level 1. It is not allowed to convert the size and depth of the
flat-bottomed hole according to the law of the AVG curve. It shall be measured
based on the sample and the 1.0 mm flat-bottomed hole. The signal-to-noise
ratio in the automatic ultrasonic testing shall be not less than 6 dB, preferably
10 dB. If necessary, perform special heat treatment before testing (see 4.2.2
and 4.2.3).
Table 2 -- Sensitivity level
Sensitivity level 1 2 3 4 5
Display wave
height/% 80 80 80 80 80
Flat-bottomed hole
diameter/mm 1.0 1.0 1.0 1.0 1.0
VK/dB +6 +12 +15 +18 +21
6.5 Testing volume
The minimum testing volume is shown in Table 3. The specific testing volume
shall be implemented according to the requirements of product standards or
agreements. If there is no specific requirement, it usually implements category
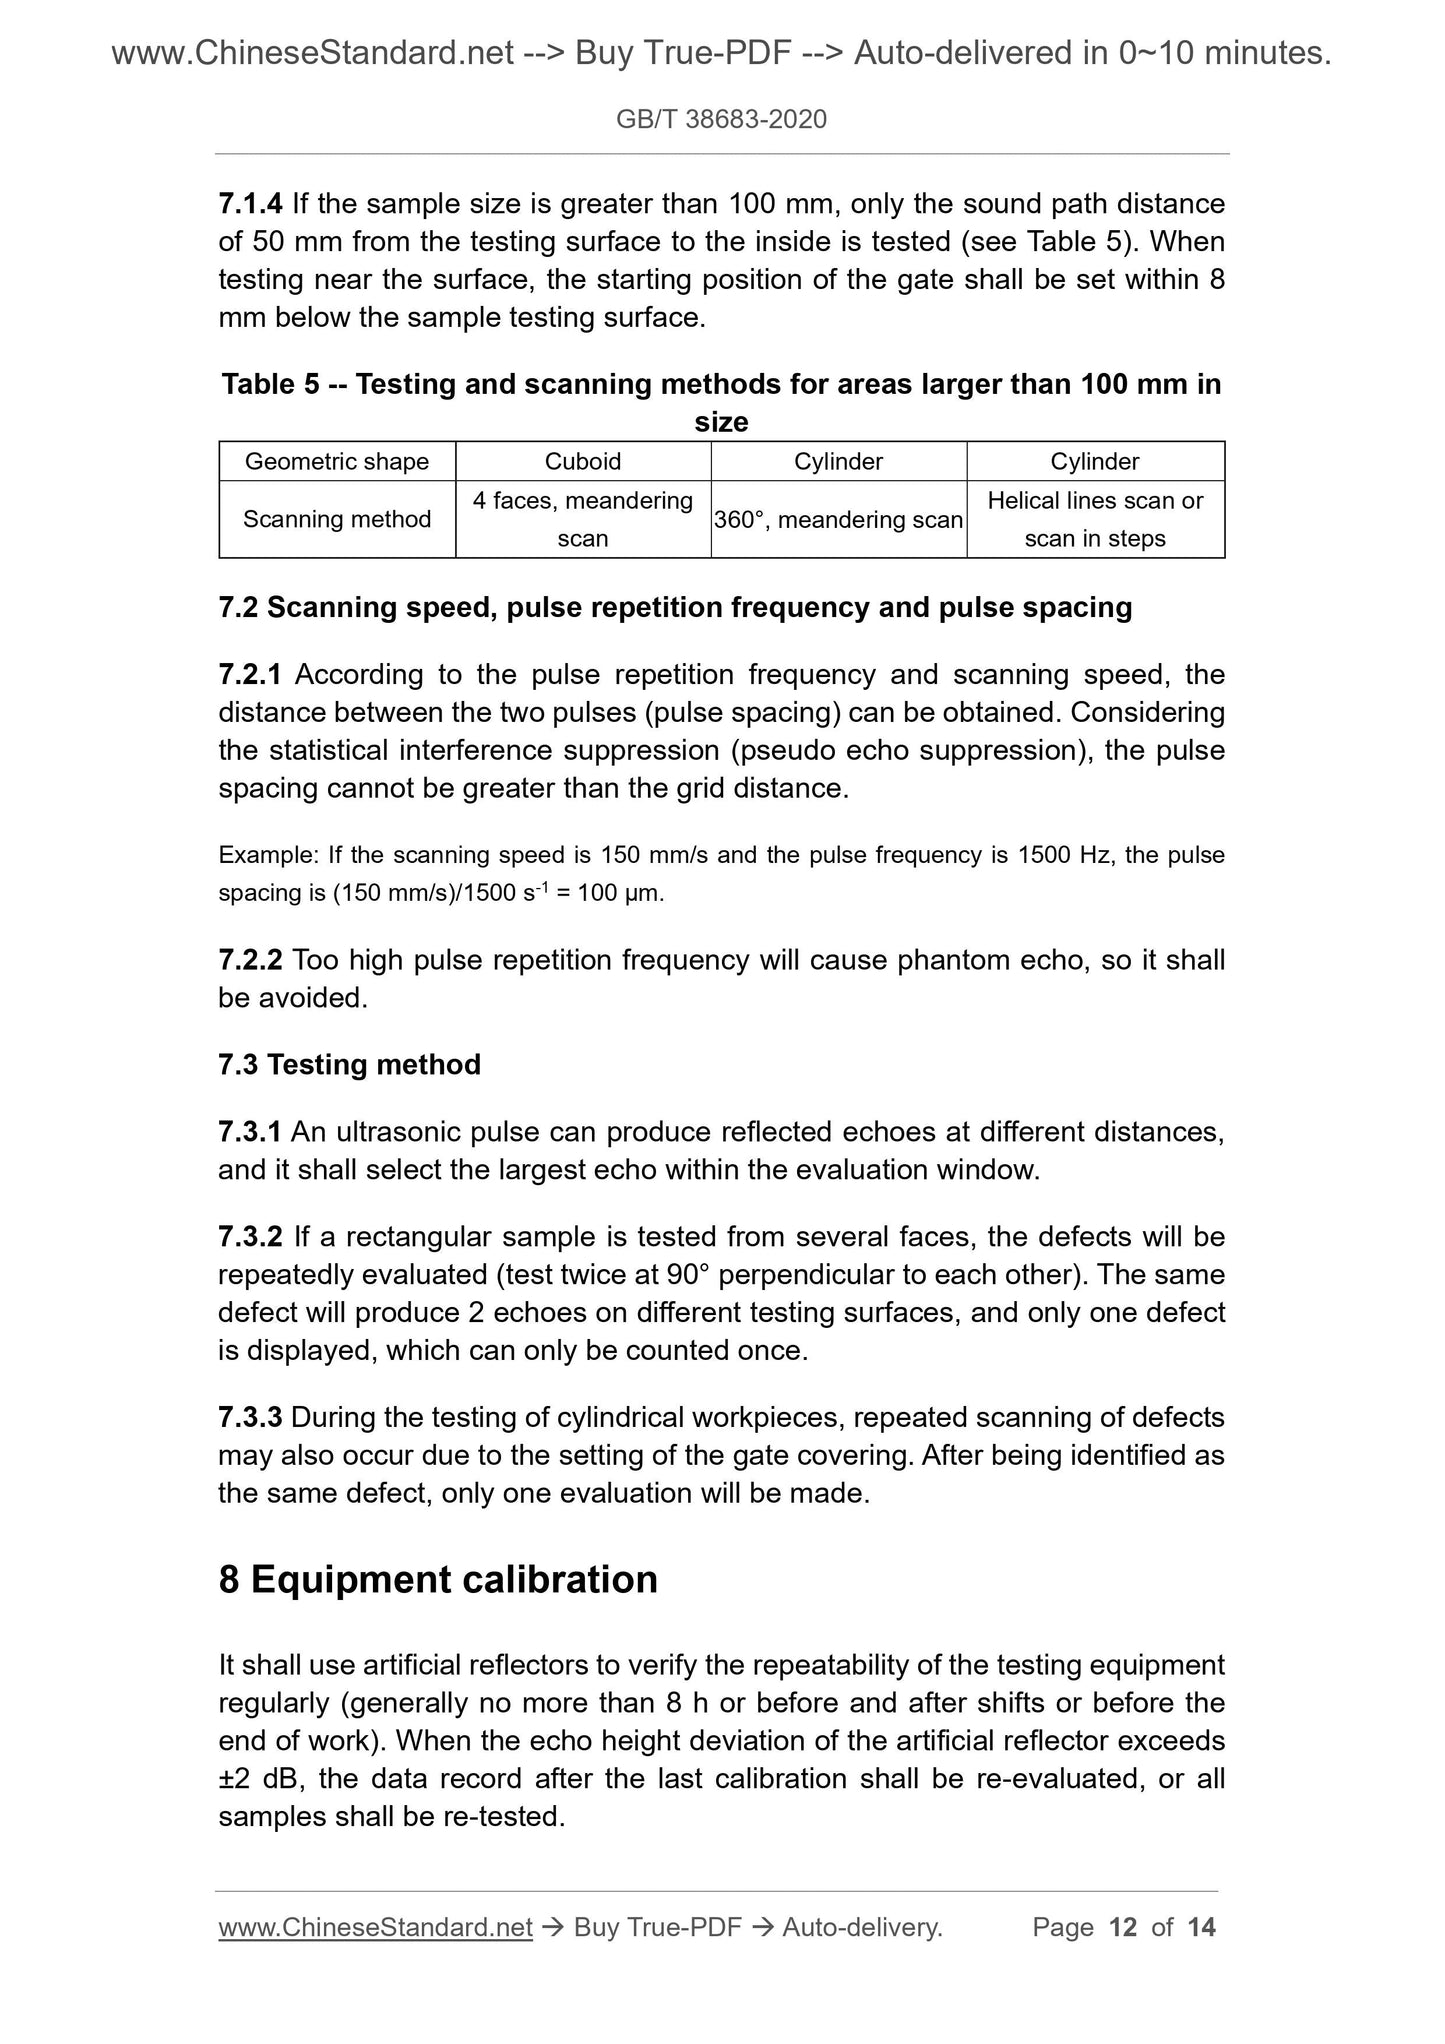
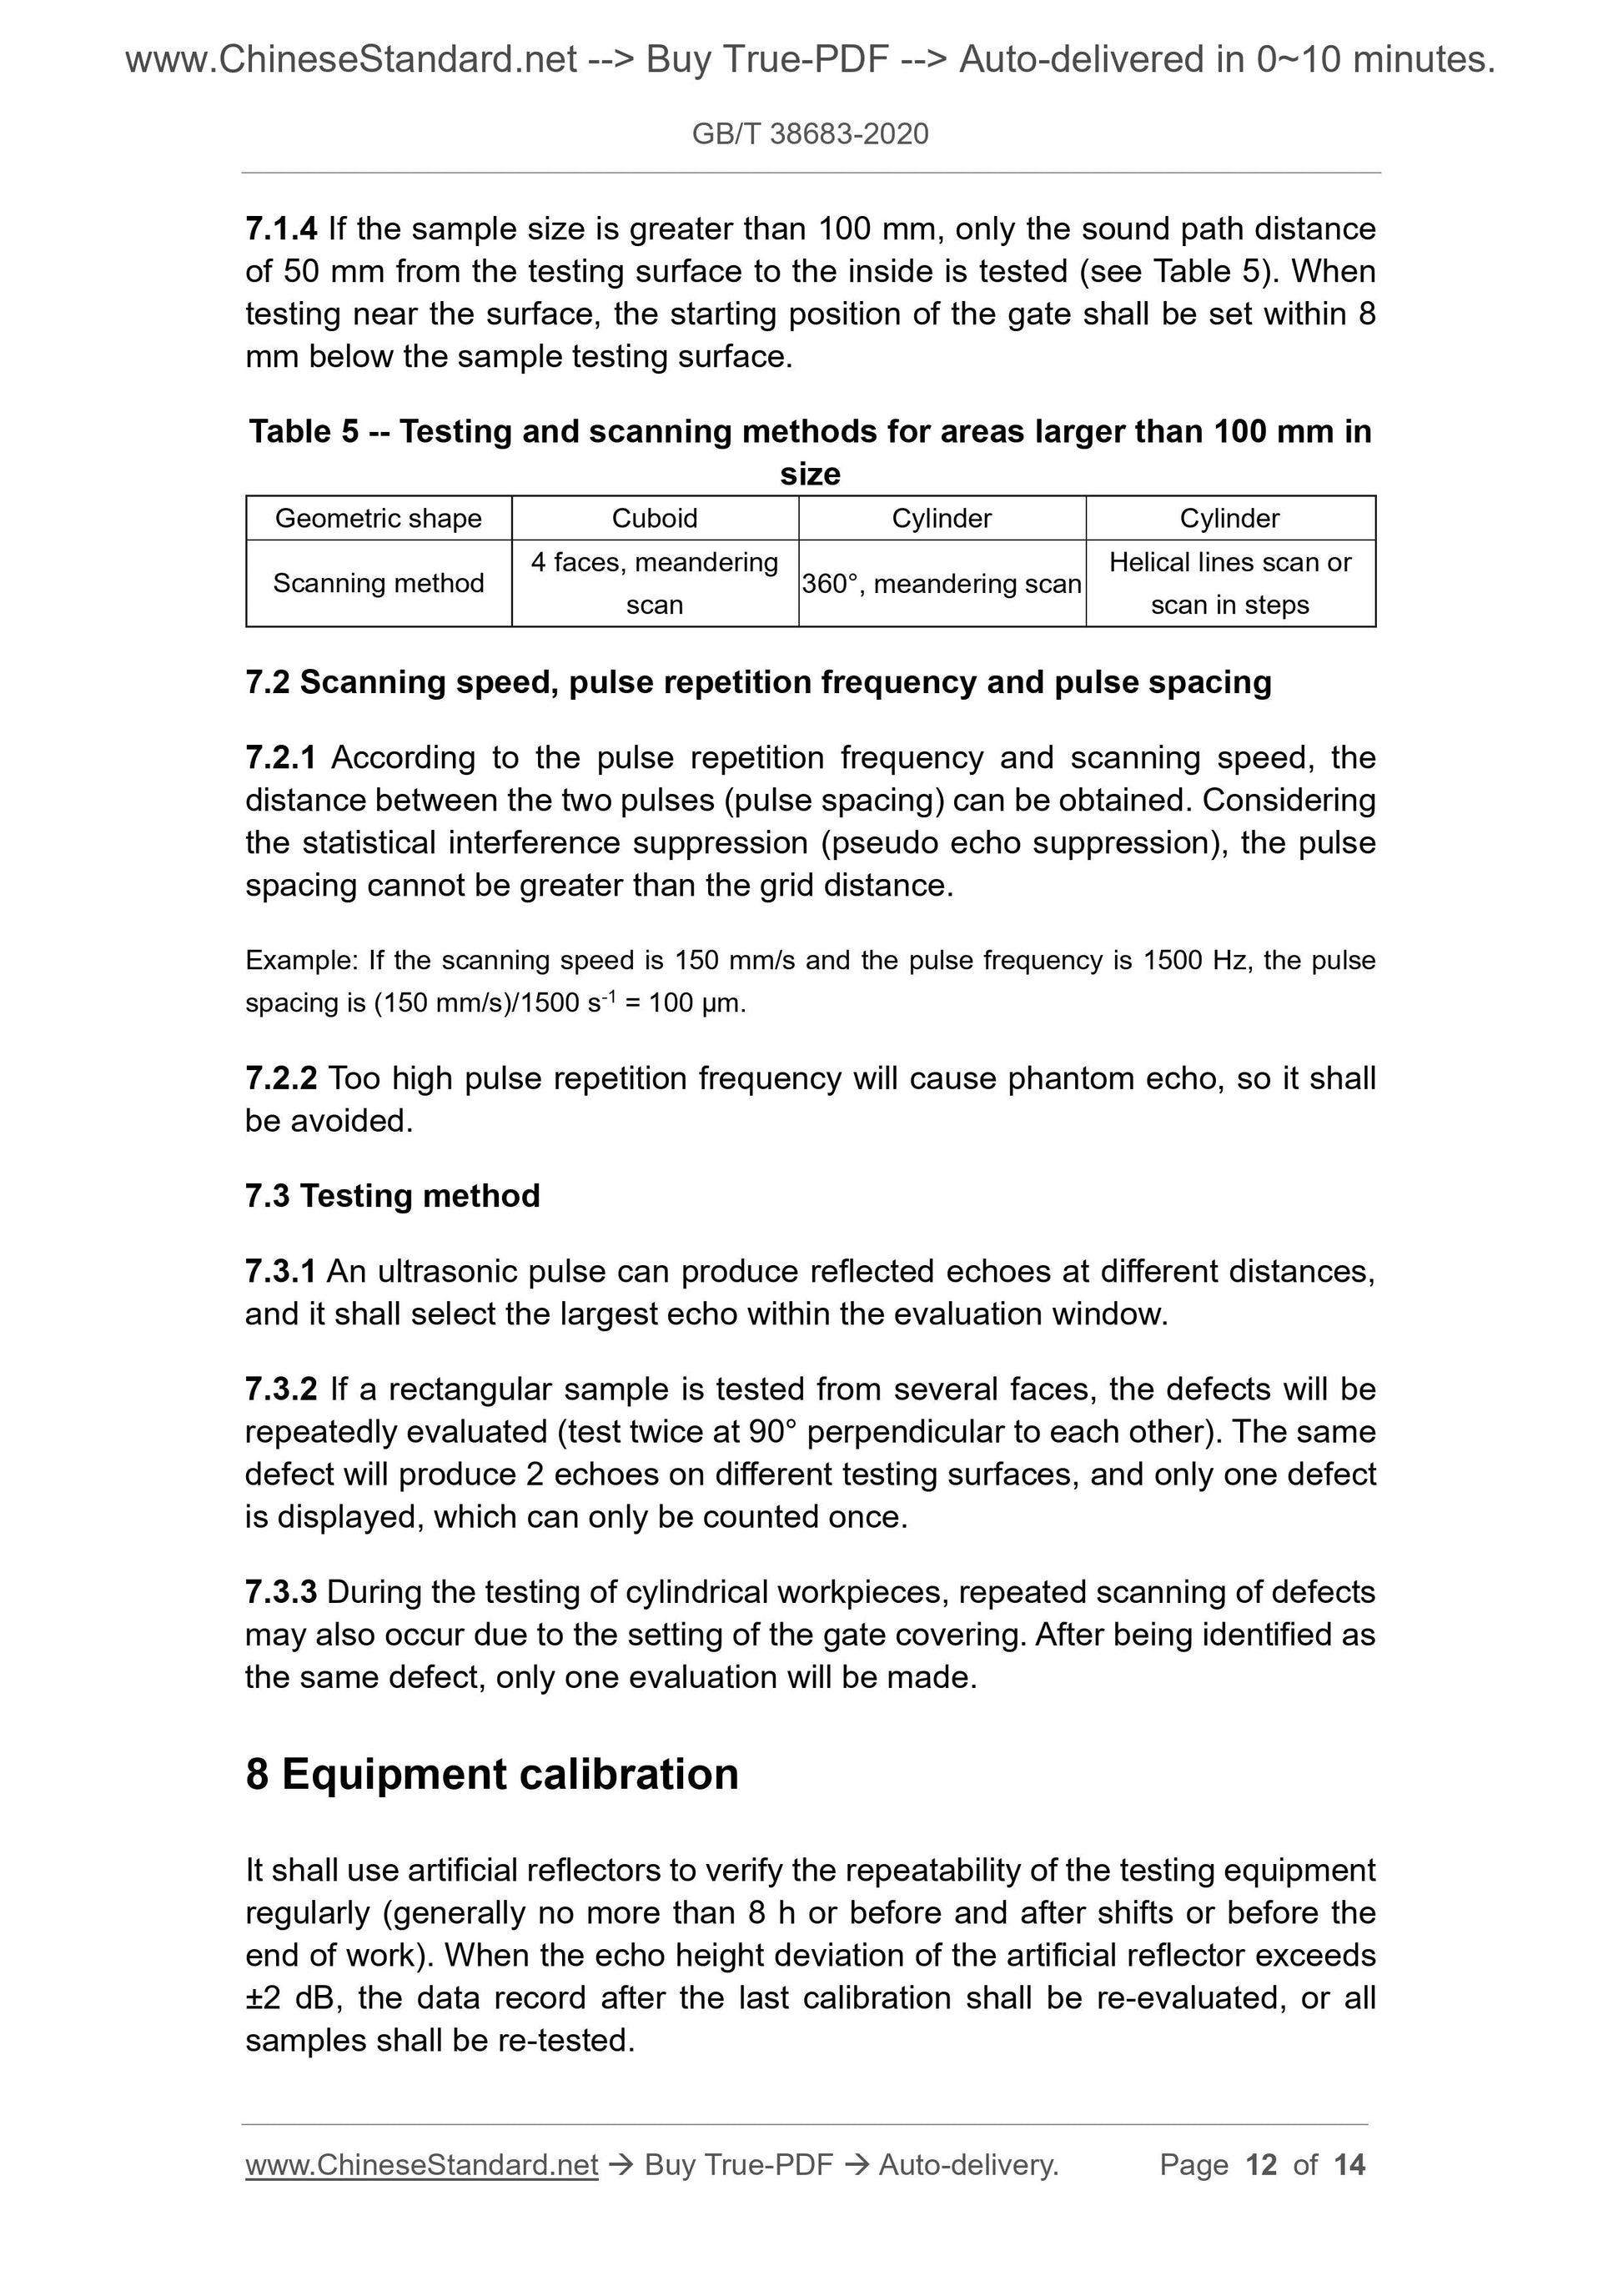
7.1.4 If the sample size is greater than 100 mm, only the sound path distance
of 50 mm from the testing surface to the inside is tested (see Table 5). When
testing near the surface, the starting position of the gate shall be set within 8
mm below the sample testing surface.
Table 5 -- Testing and scanning methods for areas larger than 100 mm in
size
Geometric shape Cuboid Cylinder Cylinder
Scanning method 4 faces, meandering scan 360°, meandering scan
Helical lines scan or
scan in steps
7.2 Scanning speed, pulse repetition frequency and pulse spacing
7.2.1 According to the pulse repetition frequency and scanning speed, the
distance between the two pulses (pulse spacing) can be obtained. Considering
the statistical interference suppression (pseudo echo suppression), the pulse
spacing cannot be greater than the grid distance.
Example: If the scanning speed is 150 mm/s and the pulse frequency is 1500 Hz, the pulse
spacing is (150 mm/s)/1500 s-1 = 100 μm.
7.2.2 Too high pulse repetition frequency will cause phantom echo, so it shall
be avoided.
7.3 Testing method
7.3.1 An ultrasonic pulse can produce reflected echoes at different distances,
and it shall select the largest echo within the evaluation window.
7.3.2 If a rectangular sample is tested from several faces, the defects will be
repeatedly evaluated (test twice at 90° perpendicular to each other). The same
defect will produce 2 echoes on different testing surfaces, and only one defect
is displayed, which can only be counted once.
7.3.3 During the testing of cylindrical workpieces, repeated scanning of defects
may also occur due to the setting of the gate covering. After being identified as
the same defect, only one evaluation will be made.
8 Equipment calibration
It shall use artificial reflectors to verify the repeatability of the testing equipment
regularly (generally no more than 8 h or before and after shifts or before the
end of work). When the echo height deviation of the artificial reflector exceeds
±2 dB, the data record after the last calibration shall be re-evaluated, or all
samples shall be re-tested.
GB/T 38683-2020
GB
NATIONAL STANDARD OF THE
PEOPLE’S REPUBLIC OF CHINA
ICS 77.040.20
H 26
Method of ultrasonic testing for large inclusions in
bearing steel
ISSUED ON: MARCH 31, 2020
IMPLEMENTED ON: OCTOBER 01, 2020
Issued by: State Administration for Market Regulation;
Standardization Administration of the People's Republic of
China.
Table of Contents
Foreword ... 3
1 Scope ... 4
2 Normative references ... 4
3 Terms and definitions ... 4
4 Testing requirements ... 5
5 Testing equipment ... 7
6 Equipment verification ... 8
7 Testing process ... 11
8 Equipment calibration ... 12
9 Evaluation ... 13
10 Testing report ... 14
Method of ultrasonic testing for large inclusions in
bearing steel
1 Scope
This Standard specifies the testing requirements, testing equipment, equipment
calibration, testing process, evaluation and testing report of the ultrasonic
testing method for large inclusions in bearing steel.
This Standard applies to the testing for internal inclusions in bearing steel bars
with a diameter or side length of 35 mm ~ 100 mm by immersion pulse reflection
method with longitudinal wave incident probes. Material of other sizes or steel
grades may also refer to this Standard.
2 Normative references
The following referenced documents are indispensable for the application of
this document. For dated references, only the edition cited applies. For undated
references, the latest edition of the referenced document (including any
amendments) applies.
GB/T 6394 Determination of estimating the average grain size of metal
GB/T 9445 Non-destructive testing - Qualification and certification of NDT
personnel
GB/T 12604.1 Non-destructive testing - Terminology - Terms used in
ultrasonic testing
GB/T 27664.1 Non-destructive testing - Characterization and verification of
ultrasonic test equipment - Part 1: Instruments
GB/T 27664.2 Non-destructive testing - Characterization and verification of
ultrasonic test equipment - Part 2: Probes
3 Terms and definitions
For the purpose of this document, the terms and definitions given in GB/T
12604.1 and the following apply.
The technical requirements for ultrasonic testing shall be implemented
according to the product standards or agreements, and shall include the
following:
a) ultrasonic testing samples shall be in the state “C” or “L” (see 4.2);
b) sensitivity level (see 6.4);
c) testing volume (see 6.5);
d) evaluation (see Clause 9).
Example: The test requirement is “C-2-c”, which means that the batch of products is in the “C”
stage, with sensitivity level 2 and testing volume c of 5 dm3. The acceptable evaluation results
are agreed upon between supply and demand parties.
4.2 Testing sample state
4.2.1 Sample requirements
The selection of testing samples can be divided into two categories: process
testing (C) and final testing (L). The sample shall be cylinder and cuboid. The
interior and surface of the sample shall not have defects that affect the testing,
and the surface roughness shall meet the testing requirements. The sampling
location and requirements shall comply with the product standards or
agreements; if not specified, it shall comply with 4.2.2 and 4.2.3.
4.2.2 Process testing (C)
4.2.2.1 The sample can...
View full details