Skip to product information
1 of 7

PayPal, credit cards. Download editable-PDF and invoice in 1 second!

GB/T 3830-2008 English PDF (GBT3830-2008)

GB/T 3830-2008 English PDF (GBT3830-2008)

Regular price $125.00 USD
Regular price Sale price $125.00 USD
Sale Sold out
Shipping calculated at checkout.
Quotation: In 1-minute, 24-hr self-service. Click here GB/T 3830-2008 to get it for Purchase Approval, Bank TT...

GB/T 3830-2008: Calendered film and sheet from flexible polyvinyl chloride

This standard specifies the product classification, requirements, test methods, inspection rules and signs, packaging, transportation, storage of calendered film and sheet from flexible polyvinyl chloride. This standard applies to smooth or shallow pattern calendered film and sheet from flexible polyvinyl chloride, which are produced by adding plasticizers, stabilizers and other auxiliaries to suspension-processed polyvinyl chloride resins, through the process of calendering.
GB/T 3830-2008
NATIONAL STANDARD OF THE
PEOPLE’S REPUBLIC OF CHINA
ICS 59.080.40
Y 47
Replacing GB/T 3830-1994
Calendered film and sheet from flexible polyvinyl chloride
ISSUED ON: AUGUST 19, 2008
IMPLEMENTED ON: MAY 01, 2009
Issued by: General Administration of Quality Supervision, Inspection and Quarantine of PRC;
Standardization Administration of PRC.
Table of Contents
Foreword ... 3
1 Scope ... 5
2 Normative references ... 5
3 Product classification ... 6
4 Requirements ... 6
5 Test method ... 9
6 Inspection rules ... 13
7 Marking, packaging, transportation, storage ... 15
Appendix A (Normative) Test method of low temperature impact ... 17
Calendered film and sheet from flexible polyvinyl chloride
1 Scope
This standard specifies the product classification, requirements, test methods, inspection rules and signs, packaging, transportation, storage of calendered film and sheet from flexible polyvinyl chloride.
This standard applies to smooth or shallow pattern calendered film and sheet from flexible polyvinyl chloride, which are produced by adding plasticizers, stabilizers and other auxiliaries to suspension-processed polyvinyl chloride resins, through the process of calendering.
2 Normative references
The provisions in following documents become the provisions of this Standard through reference in this Standard. For the dated references, the subsequent amendments (excluding corrections) or revisions do not apply to this Standard; however, parties who reach an agreement based on this Standard are encouraged to study if the latest versions of these documents are applicable. For undated references, the latest edition of the referenced document applies.
GB/T 1040.3-2006 Plastics - Determination of tensile properties - Part 3: Test conditions for films and sheets (ISO 527-3:1995, IDT)
GB/T 2410-1980 Transparent plastics - Transmissivity and haze test
GB/T 2828.1-2003 Sampling procedures for inspection by attributes - Part 1: Sampling schemes indexed by acceptance quality limit (AQL) for lot-by-lot inspection (ISO 2859-1:1999, IDT)
GB/T 2918-1998 Plastics - Standard atmospheres for conditioning and testing (idt ISO 291:1997)
GB/T 6672-2001 Plastics film and sheeting - Determination of thickness by mechanical scanning (idt ISO 4593:1993)
GB/T 6673-2001 Determination of length and width of plastics film and sheeting (idt ISO 4592:1992)
HG/T 2-163-1965 Test method for low temperature elongation of plastic films 4.4 Others
The toy film also needs to comply with the requirements of relevant national laws, regulations, standards.
5 Test method
5.1 Sampling
Samples shall be randomly selected from each delivered batch of products. On the sampled product roll, discard about 2 m from the end inward; cut the sample; indicate the longitudinal direction of the product, on the sample.
5.2 Thickness
It is carried out according to the provisions of GB/T 6672-2001. The test results are expressed as the minimum value of the specimen thickness.
5.3 Width
It is carried out according to the provisions of GB/T 6673-2001.
5.4 Appearance
Carry out visual inspection under natural light AND measurement by the corresponding gage.
The dislocation of the roll end face is to measure the distance, between the innermost and outermost edges of each side, by a measuring tool, which has an accuracy of 1 mm on the sample taken. The dislocation distance of each side shall be within the specified deviation range.
Winding quality is visually judged, on the sample taken.
5.5 Physical and mechanical properties
5.5.1 Preparation of specimen
According to the requirements in 5.1, cut a sample of sufficient size transversely. Immediately make a marking line of (250 ± 1) mm × (250 ± 1) mm, on the sampling position of the dimensional change rate, which is used for cutting the specimen for dimensional change rate test. Then prepare the specimen according to the position, which is shown in Figure 1.
5.5.2 Standard environment for specimen conditioning and test
It is carried out, under the standard environment of the temperature of (23 ± 2) °C and humidity of (50% ± 10%), which is specified in GB/T 2918-1998, AND the normal deviation range. The specimen conditioning time is not less than 4 h; the test is carried out, under these conditions.
5.5.3 Tensile strength and elongation at break
It is carried out according to the provisions of GB/T 1040.3-2006. Use type 1B specimen; the test speed (no load) is (250 ± 25) mm/min. Calculate the arithmetic mean of the test results of each group of specimens; the tensile strength is retained to the first decimal place; the elongation at break is retained to the integer place. 5.5.4 Elongation at low temperature
It is carried out according to the provisions of HG/T 2-163-1965. Calculate the arithmetic mean of the test results of each group of specimens; keep it to the integer. 5.5.5 Right-angle tear strength
It is carried out according to the provisions of QB/T 1130-1991. Calculate the arithmetic mean of the test results of each group of specimens; keep it to the integer. 5.5.6 Dimensional change rate
Cut out two specimens, which have the marked lines, according to the position shown in Figure 1. On each specimen, it shall be marked with the midpoint and direction of each side (see Figure 2).
Place the two specimens, on a cardboard, which has a flat surface and a small amount of talcum powder (about 400 mm × 400 mm, thickness about 1 mm). Use another cardboard, which is sprinkled with talcum powder, to cover it. Then use a clip, to hold the 2 pieces of cardboard together. The specimen shall not be restrained by cardboard or clips, so as not to affect the free deformation of the specimen. Put the cardboard, on which with the specimen is clipped, in an oven at (100 ± 2) °C, without overlapping. Keep it for 30 min, whilst maintaining blast. Take it out. Place it for 1 h. Remove the cardboard. Use a steel ruler, which as an accuracy of 1 mm, to measure distance, between the marks on the opposite sides of the specimen.
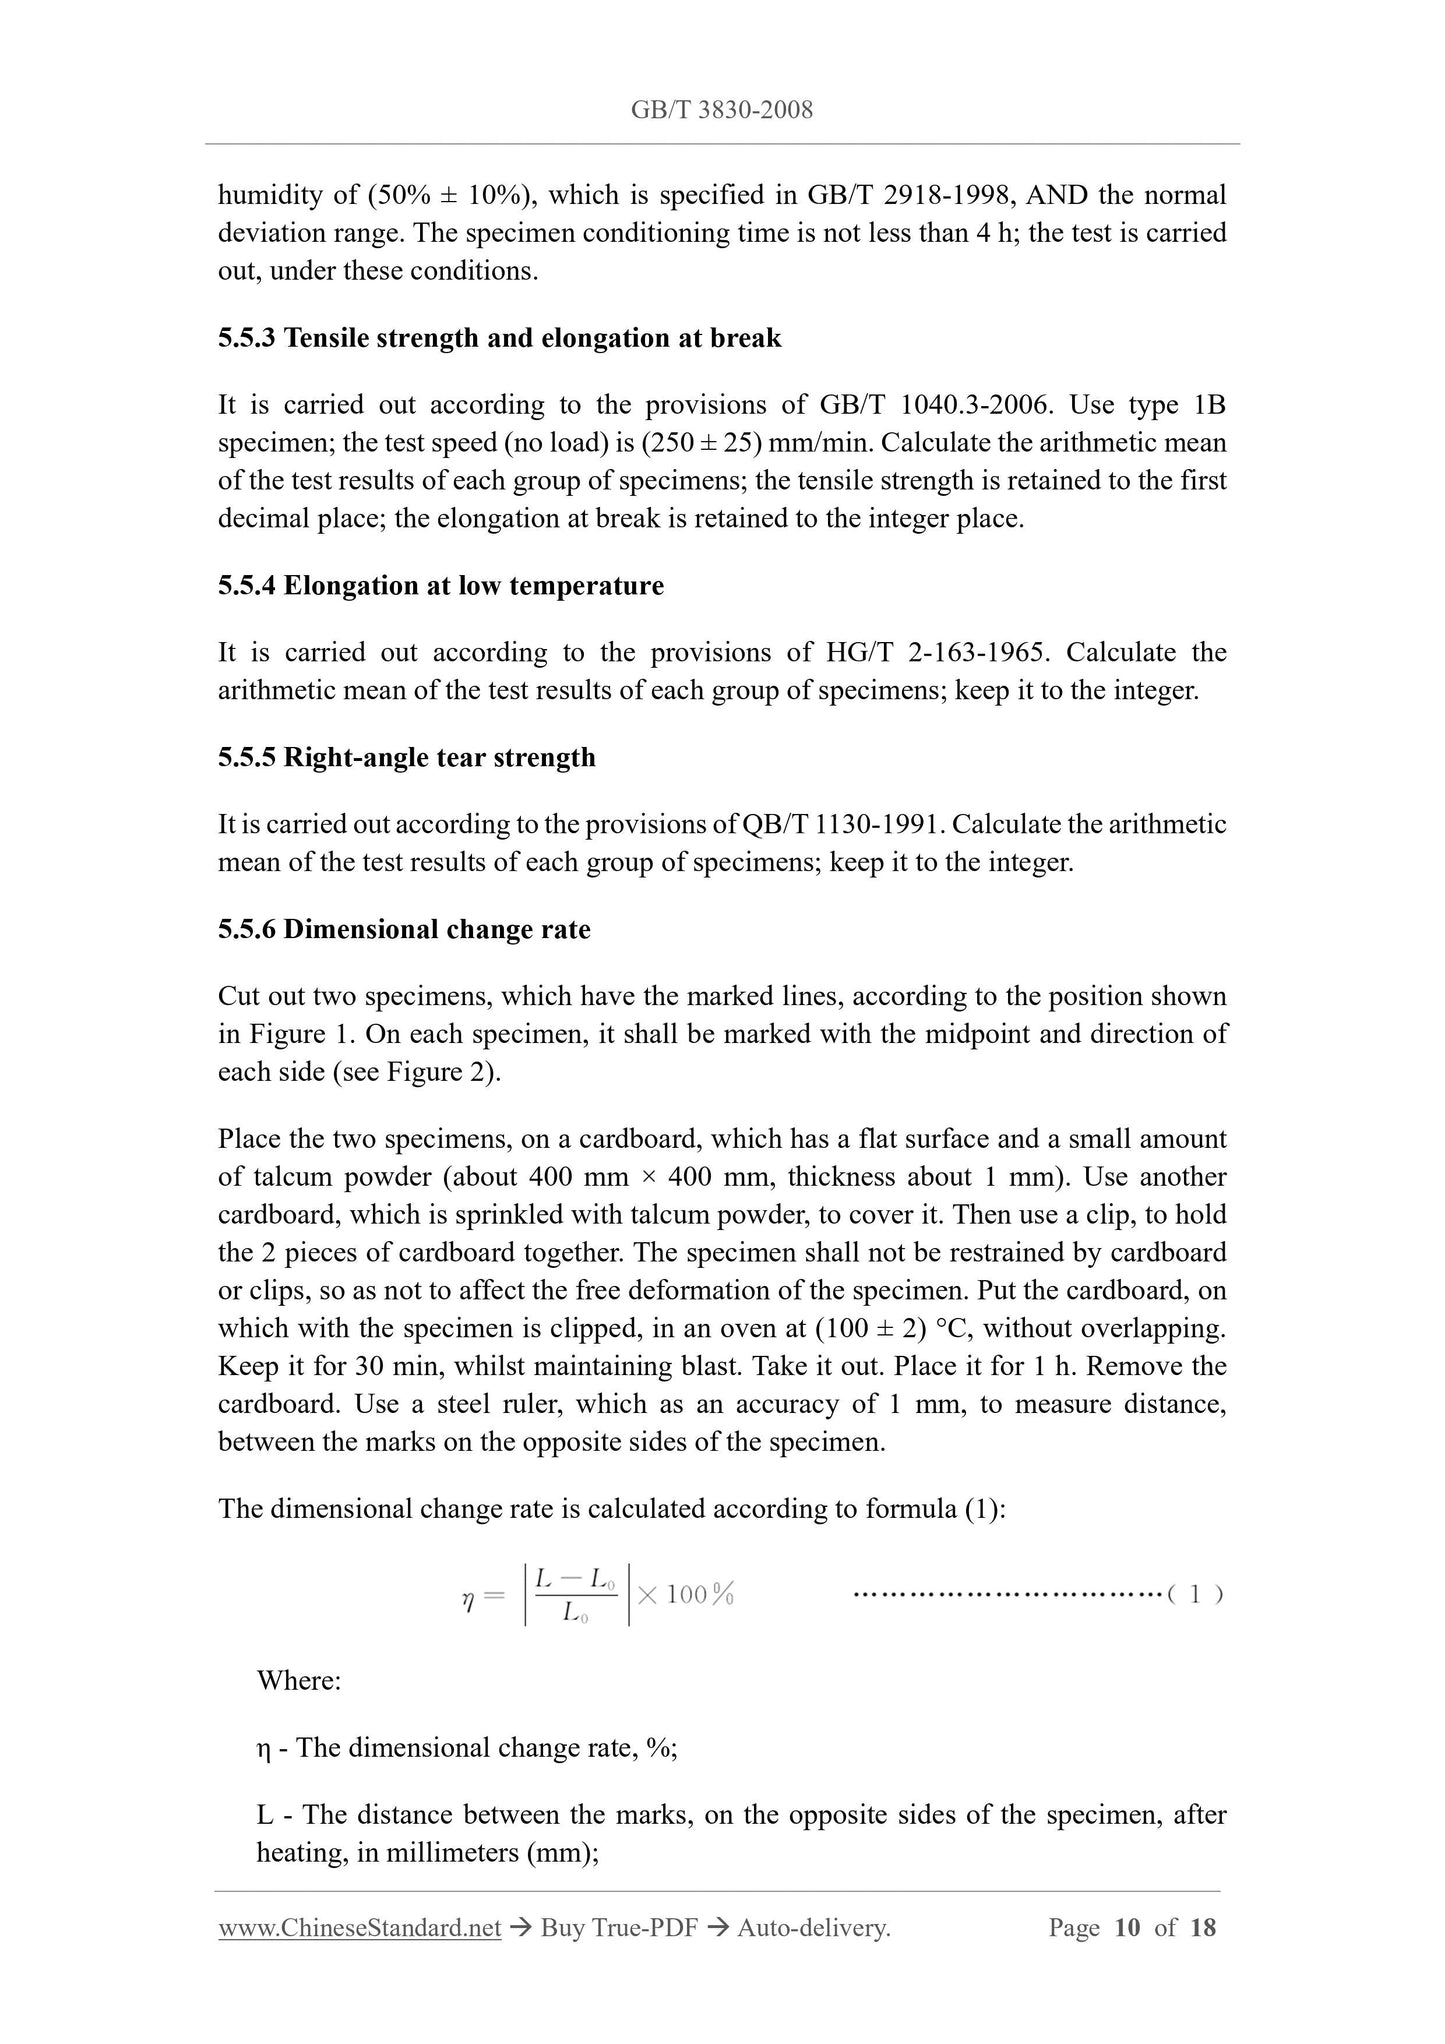
The dimensional change rate is calculated according to formula (1):
Where:
η - The dimensional change rate, %;
L - The distance between the marks, on the opposite sides of the specimen, after heating, in millimeters (mm);
which may affect the performance of the product;
c) When the production is resumed after suspension for more than 3 months, due to some reasons;
d) When there is a big difference between the exit-factory inspection results and the last type inspection;
e) When the quality supervision agency of higher level puts forward the requirements for type inspection.
6.4 Judgment rules
6.4.1 Quality judgement of sample unit
Specifications and appearance shall be carried out, in accordance with 4.1, 4.2, 4.3, 4.4. If all the inspection items are qualified, the sample unit is qualified. 6.4.2 Quality judgement of qualified batches
The specifications and appearance shall be carried out according to the provisions of Table 8.
If there are unqualified items in the inspection results of physical and mechanical properties, it shall re-take double quantity of samples from the original batch, to carry out re-inspection for the unqualified items. If the re-inspection results are all qualified, the batch is qualified.
7 Marking, packaging, transportation, storage
7.1 Marking
Each roll of product shall be accompanied by a certificate of conformity AND have the following marks:
a) The name and address of the manufacturer;
b) The product name;
c) The product category;
d) The product specifications;
e) The production date or production batch number;
f) The trademarks;
g) The product standard number implemented;
Appendix A
(Normative)
Test method of low temperature impact
A.1 Instruments
Low temperature impact tester (in accordance with American standard ASTM D 1790- 2002, as shown in Figure A.1), low temperature box (at least 450 mm × 450 mm × 450 mm in size), mold [(50.8 mm ± 0.4 mm) × (146.1 mm ± 0.4mm)], 12.7 mm stapler, cutter, cardboard (127 mm × 50 mm).
A.2 Test steps
A.2.1 Before the test, adjust the temperature of the low temperature box to the test temperature, for at least 1 h.
A.2.2 Test specimens shall be cut using a die. The length direction of the test specimen shall be parallel to the transverse direction of the product. Connect the 50 mm long ends of each specimen, to gradually form a closed circle, at room temperature (the pattern of the product faces inward). The joined edge of each specimen shall be in complete contact with one side of the cardboard, which has a size of 127 mm × 50 mm; the above- mentioned closed circle shall be located on the cardboard. Use a stapler, to staple two nails, on the contact edge of the specimen and the cardboard, at a distance of about 12.7 mm from the edge.
A.2.3 Put the whole low temperature impact tester into the low temperature box. Put the 5 test pieces to be tested into the cold conditioning box, for about 15 min. A.2.4 Put the 5 covered specimens on the bottom plate, respectively. Put the curled part of the staple, behind the cardboard, into the groove of the bottom plate. Do not operate on the specimen, but on the cardboard. Place the closed loop of the bending specimen, on the center of the base plate; make the closed loop facing away from the pivot end of the impact handle.
A.2.5 Let the impact handle fall freely on the curved closed loop, at an angle of 5°. Repeat this operation, until all 5 sets of specimens to be tested have been tested. A.2.6 Move the specimen, to check the damage. It shall take into account of not only damage that breaks into several pieces, but also the partial damage. At the specified temperature, the number of specimens damaged shall not be greater than 20% of the number of tested specimens.

View full details